Showing posts with label cookies. Show all posts

Monday, May 24, 2010

Good Foods Come in Threes

I promised to do some foodie reviews and have kind of dropped the ball... and I've been meaning to tell you about my new favorite breakfast cereal, too. I'm thrilled to have THREE great items to share with you: a snack, a drink, and a cereal (aren't those the three basic food groups?).

Anyway, here are the great things our family has discovered in the past few months (and have subsequently added to our master grocery list):


Home Free Organic Cookies


These little goodies are food allergy approved! They contain no nuts, no eggs, and no dairy (and are made at a dedicated bakery). I promise, they DON'T taste like the box! Organic sweets are wonderful to have around the house when the munchies take over. Home Free did a great job on these, considering all they left OUT.

I feel good feeding these oatmeal cookies to the munchkin - since he's on a baby food strike and we are having trouble getting him to eat anything at all right now that doesn't resemble a cookie or a chip. Good thing I'm still nursing him, or he would probably starve himself to death.

Hop over to homefreetreats.com and find out more about their standards on their FAQs page if you are feeding a sensitive tummy. Or you can click on their Store Locator page to find out the nearest place where you can purchase these yummy snacks.

These cookies are great for people with food allergies, but they DO contain gluten. Are you confused about food allergies and celiac disease (gluten sensitivity)? You aren't alone. Check out this informative Celiac vs. Food Allergy article that Home Free sent to me with their free cookie sample.


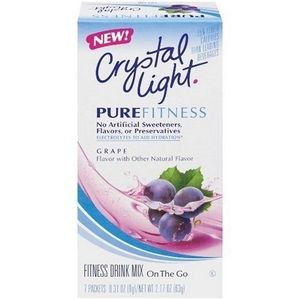
Crystal Light Pure Fitness Sport Drink

I almost said no to Crystal Light before they ever sent the samples - because I figured they had artificial sweeteners. I was VERY impressed that they have opted to go 'healthy' by eliminating the fake stuff and adding evaporated can juice and Truvia (an all-natural, calorie free sweetener derived from the stevia plant). Another cool thing about the samples that they sent was that they are individual sized servings (a tiny packet you can dump in to your cold bottled water - or add to your water glass at a restaurant). If you want to drink more water but you really aren't a big water-fan, this stuff is for you! It also is handy if you eat out - because ordering water at a restaurant can save you oodles of money. Now everyone can have a flavored drink without paying an extra 8$ or more on the tab (my kids love this angle).

If you enjoy Crystal Light, follow them on twitter: @CrystalLight. Tell them Sprittibee sent you. Maybe that will make up for how long it took to review their drinks!


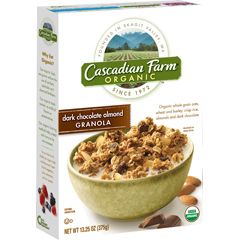
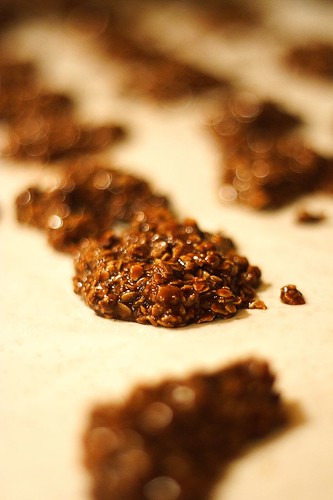
Dark Chocolate Almond Granola

Cascadian Farms have outdone themselves this time. This stuff is 13.25 ounces of pure breakfast bliss. I didn't get a free sample of it - but I do have a serious addiction. I figured if I told more people about this chocolate-lover's secret, maybe more of my favorite grocery stores would carry it. So far I haven't seen it at Walmart (for shame). According to their website, you could snack on it without milk (why didn't I think of that?) and use it as a topping for ice-cream (OH. MY.)... but please - do yourself a favor and BUY SOME. Who cares that it is completely natural and organic. It's all about the flavor, baby.

There you have it. Three new finds to treat yourself on. Off to the store you go!


Disclosure: As stated in this post, the cookies and drink were provided for my honest opinion, free of charge. The granola was purchased by me (but you still got my honest opinion).

Wednesday, April 15, 2009

No Bake Cookies: Your Butt Will Hate You

IMG_4550

The other day I got a craving for a little gem of a cookie that I hadn't made for years. I see them at The Market where I work and I endure a fierce battle in my mind every time a customer comes through with a pack of them. Because I've lost 15+ pounds in the last few months and those cookies are The Devil.

But then I got sick and had my girly time (sorry boy readers) at the same time and well, my defenses were down. I made the cookies. In fact, I made them twice. Only the second time, I did remember to take pictures so the 2% of you who have never made these can see how it's done.

IMG_4525

The beauty/evil of these cookies is that they are super quick: to make and to eat mass quantities. And most of us have the stuff in our cupboards already. DRAT! It's too easy!! You can find the recipe I used here. But I have to say I was bummed because I used to have one from my grandmother for these and it's now in the same wormhole as a couple remotes I lost and one of my favorite striped socks from last winter.

Here you can see you'll need milk, butter/margarine, peanut butter, chocolate chips, quick oats, vanilla, and SUGAR.

IMG_4528

I do this the lazy way. I use one big pot and mix it all in there. I hate washing dishes,so it's not likely I would use another bowl unless someone was holding a knife to my throat. Anyway, throw the stick of butter in there, along with the milk...

IMG_4529

...and the massive amount of sugar.

IMG_4534

Then stir it a little and bring it to a rolling boil. That means boil the heck out of it. This is VERY important: once it really starts boiling hard, set your timer for one minute. You absolutely MUST boil it hard for one minute. No less. Or else they won't set until the next day and everyone will be eating goopy cookies from a plate with a fork. Not that I would know anything about that.

IMG_4536

After a full minute has passed, quickly add the other stuff in. The recipe I used says peanut butter is optional. They blaspheme. Peanut butter is NEVER optional. I spit on you Optional Peanut Butter Fools! Unless you are someone who will suffocate from peanut allergies, then I guess that would be cool to leave it out. We don't want any of that going on.

IMG_4539

Add the oats. Which are the only healthy thing going for this cookie. It's because of the oats that I am duped into eating mass quantities every time I make them.

IMG_4541

You'll want to finish stirring the rest of the stuff in there quickly because if you boiled properly, this stuff will already begin to harden a bit. So don't mess around. No texting or twittering or Facebooking or plucking chin hairs in between the steps.

IMG_4544

Get some wax paper and plop some globs onto it. Don't make them too big or they'll set slower. Then you have to wait to eat them. That stinks.

IMG_4551

I've had varied results with the setting time. Sometimes they set within 15 minutes. Sometimes they don't set until the next day. They say that has to do with the boiling thing. I say it has to do with the economy. Why not? Everyone blames everything else on that.

IMG_4555

One should really work out after eating these. I'm just saying. But I've been sick, so I haven't worked out. And I ate a lot of them. I have a feeling you will too. They were totally worth it.

Love in Him,

Tuesday, January 06, 2009

Who Said Truffles Had To Be Round?

2008 12 19 031

Twas the night before Christmas (or the week before in my case),
when a fellow cashier and I were standing around at our registers wondering where all the yuletide shoppers were. In that fateful moment she whipped out some of those free recipe cards you find littering the floor of some major retailers around the holidays. You know, the kind the little Sample Ladies hand out and somehow the little naughty children get a hold of them and throw them all over the floor for friendly cashiers like me to pick up?

Yeah, those ones. So she handed me one and I skimmed it at lightning fast speed because I'm not usually into these froo froo holiday recipes and whammo!~I saw one that only took three ingredients. Three! How simple can that be, I thought.

So as I made my maiden voyage into the land of Truffles, I took some photos, because I thought maybe you all needed a laugh.

Join me for a journey of unexpected surprises.

And go here for the actual recipe that you can print out for your own maiden voyage of Truffledom.


2008 12 19 006
There you have it, the 3 Musketeers, if you will. A deadly combination if I ever saw one. But I will warn you: a simple ingredient list doesn't always mean a simple recipe. You'll notice on that innocent red card that this recipe is actually called "Easy OREO Truffles." Ha. That's a good one. But don't be disheartened yet.

Step 1: crush the oreos. Learn from my mistakes young grasshoppers.
2008 12 19 008
Crushing oreos in a plastic baggie with a sharp meat tenderizer isn't the best idea I've ever had. I got three whacks in before I notice the gaping holes in the bag. Duh.

So I pushed my laziness aside and got out the Big Daddy of crushing.
2008 12 19 013
It made short work of making these beauties into crumbs.


2008 12 19 014
That's the stuff that dreams are made of.


Step 2: Add the cream cheese to the crumbs and try not to eat too much of this.
2008 12 19 019

Step 3: Break up BOTH boxes of chocolate into squares and melt it.
2008 12 19 021

Here's where you have a choice. Microwave or stovetop. When it comes to melting chocolate, I always choose stovetop because it is inevitable that when I put chocolate to melt in the microwave, it will burn and smell very badly for the remainder of the day. Maybe you don't have this problem. If not, nuke that chocolate to your heart's content.

2008 12 19 022
Melt the chocolate, and stir it almost constantly. You don't want any of that chocolate goodness to burn to the bottom of the pan. And you want it consistently hot because the purpose of this is for dipping. Which it turns out, I am not an expert at.
Step 4: Make 1 inch balls with the cream cheese/crumb mixture.
2008 12 19 023
If I ever make this again, I would chill this mixture for about an hour before I formed it into balls for dipping. This was messy and uncooperative. It was at this point that I started to doubt any culinary abilities I've acquired.

Step 5: Put some melted chocolate in a bowl and get two forks.
2008 12 19 024
This is how you will dip the balls. Work very quickly because the chocolate will be cooling at breakneck speeds. And the two forks are not for practicing any kind of ninja moves. You'll need both to perform a move much like Mr. Miyagi to roll your cream cheese balls around in there.
Step 6: Don't worry if your truffles don't look nice. Just get them on the wax paper.
2008 12 19 025

And here's a tip: put a cookie sheet under that wax paper. You'll need it later. I learned that the hard way.

Step 7: Sprinkle the remaining crumbs onto the truffles and put in the fridge for an hour or so.
2008 12 19 027

And here's the part that makes it all worth it.

2008 12 19 031

These tasted so darn good, I momentarily forgot all about the holes in the plastic ziploc, the gooey hands covered in cream cheese/crumb mixture that made it near impossible to take pictures. I almsot forgot the Mr. Miyagi type moves it took to roll them in the melted chocolate.

Because round or not, these truffles are fantastico to eat.

Wednesday, December 24, 2008

Merry Christmas!


Merry Christmas from our kitchen to yours. We hope that your plates are full of delightful foods, your tables are set with lovely Christmas cheer, and the people you dine with are beloved friends and family.

Subscribe to Gathering Manna by Email

Technorati Tags: , , , , , , , , , ,

Sunday, June 10, 2007

Honey Cookies (Better than Snickerdoodles!)

These cookies are better than snickerdoodles. If you don't know what a snickerdoodle is, you haven't lived. OH. YES. You don't believe me, do you? Honest to goodness, these cookies are THE BOMB. Like a golden treasure in a hidden cave, my children and I discovered the recipe for these wonderful cookies in a children's book. I wish I could give the author a great-big, Texas-sized hug... because these little sweeties are now my favorite cookies (well, at least they are right up there with Mexican Wedding Cookies for sure). Move over Nestle's Toll-House Chocolate Chips and Grandma's Oatmeal Doodles. There's a new bad-boy in town.

I have written down my "healthier" version of the recipe below... but if you want to know the author's original one, you'll just have to read the book. Believe me - it is worth having on your children's book shelf. It is a very, very cute book indeed. The title? A Cow, a Bee, a Cookie and Me

INGREDIENTS
1/2 cup real butter (or 2 sticks)

2/3 cup granulated turbinado sugar (you can buy it at Wal-Mart if your grocery store doesn't carry it)

2 tablespoons raw honey (plus a little extra if you like)

1 fresh egg yolk

1 level teaspoon cinnamon

1 3/4 cups half wheat, half white (unbleached and unbromated flour)

2 3/4 teaspoons baking powder

1 teaspoon of salt

Cinnamon and Sugar mixture for coating

INSTRUCTIONS
Preheat oven to 350 degrees F.

In a large bowl, cream together the butter and sugar. Beat in honey and egg yolk.

In another bowl, sift together the cinnamon, salt, baking powder and flour (you can just use a fork if you are in a hurry).

Pour flour mixture into creamed mixture and blend into a soft dough. The dough will be pasty and not loose. Don't be afraid if it seems really thick - it isn't a runny dough. Once you have it completely mixed, it will look a lot better. Don't add any more egg or butter - even if you are tempted.

Shape dough into teaspoon sized balls (roll them in your hands) and roll them in in a plate of cinnamon and sugar mixture before placing them (spread apart nicely) on a foiled cookie sheet. Mixture should make about 30-40 smallish cookies if you can prevent yourself from devouring the dough (good luck!).

Bake for 12-15 minutes depending on your oven and altitude. Take them out when you first see a hint of browning because they are better when they are soft (but not gooey). These cookies will get hard quickly, so if you like them softer, be sure to NOT bake them until browned and keep them in an air-tight container after cooling (that is, of course, IF there are any left over to store). Around my house, we usually eat them as quick as they come out of the oven.

You are going to thank me for this recipe. I promise.


Friday, December 16, 2005

Gingerbread People


GINGERBREAD PEOPLE COOKIES:
1 cup butter, softened
1 1/2 cup white sugar
2 tbsp light corn syrup
1 egg
2 1/2 cups all-purpose flour
2 tsp baking soda
2 tsp ground cinnamon
2 tsp ground ginger
1/2 tsp ground cloves
1/4 tsp allspice

Cream together butter, sugar and corn syrup until smooth. Beat in egg. Combine flour, baking soda, cinnamon, ginger, cloves and allspice; stir into creamed mixture. Cover and refrigerate dough for at least thirty minutes. When ready to bake, preheat oven to 375 degrees. On a floured surface, roll dough out to about 1/4 inch thick. Cut into desired shapes. Place cookies on greased cookie sheets about 1 1/2 inches from each other. Bake for 8 minutes. Allow to cool on baking sheet five minutes before removing. Remove to wire rack to cool completely. Ice with below recipe and decorate. Makes about 36 cookies.

ICING:
2 egg whites
1/2 tsp cream of tartar
2 cups powdered sugar

Whip egg whites and cream of tartar until foamy. Gradually add sugar and continue to beat until icing is stiff. Add food coloring if desired. Pipe onto cookies and use as glue to affix candy decorations.

Tip: You can spoon the icing into a big Ziploc baggie (or several small ones if you seperate icing and do different colors - or if you have tiny helpers who need smaller bags) and cut the tip of the corner of the bag, twisting the icing down and out of the hole if you don't have a icing tool. The larger your hole, the more fat the line will be.

Recipe and photo courtesy of Texas Co-Op Power Magazine - December 2004 Issue

Saturday, August 13, 2005

Low Carb No Bake Cookies

I have not tried these, but they look interesting enough...

Low Carb No Bake Cookies @ The Low Carb Cook!