Showing posts with label Comfort-Food. Show all posts

Friday, December 11, 2009

The Glorious Taco


I'm not sure I would be alive without tacos. I love breakfast tacos, meat tacos, and even my latest healthy lentil tacos. I might shrivel up and die if there were no such thing as tacos. So when you get a chance today, hug a Mexican. Tell them THANK YOU for their ingenious contribution to your menu.

I have found that everyone does Taco Night a little different. Being that I used to be a young kid who barely knew how to boil water when I got married, I figured I would share what I know about tacos - just in case someone out there needs to know... even though it seems really too easy to take up recipe-blog space. Who knows, maybe it might give someone out there who already knows how to cook some new ideas, too.

We make tacos about once a week or once every other week. I usually alternate them with Cheese Enchiladas or some other Mexican dish so that we can at least have Mexican (or Tex-Mex) one night a week.

FOR THE MEAT EATERS:

Everyone should know how to make tacos.

lean ground beef cooked with chopped onion
McCormick Taco Seasoning
pan-fried flour or corn tortillas (with butter or oil)
chopped lettuce
chopped tomato
shredded Mexican style cheese
sour cream

Serve with:
refried beans
Spanish rice


FOR THE BREAKFAST FANATIC:

Breakfast tacos are probably what Jesus eats now that he's in heaven.

eggs
butter
crisp thick bacon (fat chopped off)
pico de gallo (mixture of chopped onion, tomato, cilantro and jalapeno)
shredded cheese
warm, pan-fried flour tortillas (fried with a touch of butter)

Optional:
Salsa


FOR THE VEGETARIAN OR HEALTH-NUT:

A cow doesn't have to die for you to enjoy the yummy taste of a taco for dinner.

Lentil-Rice Casserole (with the right seasoning blend it subs as the meat)
Seasoning: Cumin, Coriander, Garlic, Salt, Pepper, Chili Powder, Jalapeno Tabasco, Onion, Cayenne...
pan-fried flour or corn tortillas (with butter or oil)
chopped lettuce
chopped tomato
shredded Mexican style cheese
sour cream

Serve with:
Dessert (because you saved some calories, right?)

Note: All tacos taste good with sweet tea. Not too sweet. Even breakfast tacos. Trust me. I know these things first hand.


Next up... what to do with Taco Leftovers...


Subscribe to Gathering Manna by Email

Technorati Tags: , , , , , , , , , , , , , ,

Friday, June 26, 2009

Free Kids Meals and Meal Deals


I don't know about you, but I love Luby's. Yeah, I've heard people say it's denture-food because lots of old people like to eat at cafeterias. Poo-poo on that, though. And lots of old people just can't be wrong. They are smarter than us by quite a few years!

What I love about Luby's is that it allows my whole family to get whatever they are in the mood for - no fighting or fussing! And the sweet tea. Good heavens, the sweet tea is divine!

Another great thing about Luby's is their motto: "Tastes like Texas. Feels like home." Anything that Tastes like TEXAS just can't be bad.

I can remember eating at Luby's when I was knee-high to a grasshopper and ordering a tiny plate with red jello. My kids have all had that plate (at least most of them - we have a grasshopper that hasn't started out on table food yet - but I'm sure he'll love Luby's, too).

What do I order when I go? It depends. I love the fried fish, the chopped steak, the turkey and dressing, the enchiladas, the blackened fish, and the chicken picata. As for sides, I change those up almost every time I go.

If you haven't been to Luby's in a while, take advantage of their Luann rewind and catch a full meal for 5.99 until July 10th. For July 4th they are offering free kids meals, too. It would be a great time to have a just-like-home cooked meal that you don't have to cook yourself.


That's the other great thing about Luby's... they do the dishes!


* I was not paid or rewarded in any way to write this post!!! I just lurve, em!

Wednesday, February 25, 2009

Pepperoni Stromboli: with Bacon of course!

IMG_1760

You might be tempted to ask: What the heck is a stromboli? Basically, it's a pizza rolled up into a great big sandwich. If that sounds like something you want to ingest, then keep reading.

IMG_1703

That photo looks like an advertisment for Aldi. Obviously we do a lot of our shopping there. Don't judge. You're going to need that stuff and the stuff you can't see; like cornmeal (optional), spaghetti sauce, a baking sheet and an appetite. For a complete list of ingredients and measurements, I've made a google document that you can print out. It's here.

For now, I'm just going to cover the basic steps with some well-timed photography. Join me or starve.

IMG_1704

Let me just say here that a kitchen aid is a huge help in this recipe. I used to make bread products without it and honestly I'm not sure how I survived. But you don't have to have one. No biggie. We're not even going to knead the dough. As with any recipe for bread dough, the water needs to be warm. Really warm. But not so hot it will burn you. Unless you're a sissy.

IMG_1705

Add the yeast. I use the kind in the jar, but whatever. If you buy the packages 4 1/2 tsp would be 2 packages.

IMG_1707

Go ahead and add in the sugar and salt. Let it bubble and get all disgusting looking. It should be disgusting enough in about 5 minutes.

IMG_1709

Let's discuss the oil factor again. You can use vegetable oil if that's all you have. But for the love of Mike, do yourself a favor and get some olive oil. It's worth the expense and your arteries will thank you when they get all flushed out and whatnot.

IMG_1710

See how's it all bubbly? That's good. Real good.

IMG_1714

Time for the flour. Don't be chucking the whole amount of flour in there like some kind of spaz, ok? Start with 2 cups. Flour is a fickle chap and will turn on you if you don't handle it like the delicate baby he is.

IMG_1715

When it looks like this, you're getting close. You'll want to continue to add 1/2 cup of flour at a time, then mix. See down at the bottom of the bowl where the dough is sticking big time? That means you need a little more flour.

IMG_1718

Now see how it's starting to let go a bit? That means don't add any more flour or your dough will be stiff.

IMG_1725

By this point you might be tempted to think this is way too much work. If you are, then go sit in the corner. You need a time out. Once you taste this stuff, you'll be glad you put forth the effort. Once that dough is mixed, roll it out onto a floured surface into a large rectangle about the size of your baking sheet. And before you transfer your big dough rectangle to the baking sheet, there's one step I didn't get a photo of due to gremlins busting my chops. Get some cornmeal and sprinkle it on the baking sheet after you spray it down with cooking spray. The cornmeal makes a really nice texture on the bottom of the crust.

You don't have to have it though. It's not that big of a deal. Just a nice touch.

IMG_1719

Once you've put your dough on the sheet, it's time to doctor it up with goodness. Spread the spaghetti sauce down the middle in a big strip. Not all the way to the edges like pizza. Then sprinkle cheese and pepperoni's. It really doesn't matter which order with those two. And lastly, BACON BITS! Use the real ones. If you have to ask why, I don't think we can be friends anymore.
IMG_1720

I made this for years without bacon and let me tell you, I always had a strange hole inside me that I just couldn't fill with anything else. A bacon shaped hole. Now I feel complete.

IMG_1726

Turn the ends up over the filling.

IMG_1728

Then turn the sides up over that and pinch all the edges closed. You don't want any of that goodness leaking out.

IMG_1732

On the top, drizzle olive oil and sprinkle bacon bits and oregano into the oil. Oh my.

IMG_1741

Throw that puppy into the oven at 375 for about 30 minutes. This is the tricky part. Sometimes it won't take that long. You have to be checking on it like a sneaky toddler that gets too quiet.

Set your timer for 20 minutes and when the whole thing is nice and brown, it's probably ready.

IMG_1742

Despite your best efforts, some of the cheese will escape. But it's ok. You can eat those little globs when no one is looking. They're the best.

IMG_1748

You don't want it any more brown than this.

IMG_1747

See how the cornmeal attaches to the sides and bottom? It's lovely.

IMG_1754

When you cut it open down the middle, it should look like this. If by chance the cheese is not melted, don't freak out. There is NO freaking out with stromboli. Just slide the two sides back together and stick it back in the oven for 5 or 10 minutes. I've done it a lot.

IMG_1761

This is where you decide if you want to call anyone else in to eat with you. Personally, I could eat way too much of this stuff. I'm limiting my white carbs these days because I find I can go a little nutso with the bread. But every once in awhile, you just need some white carbs. Because maybe it's been a bad day or you're trying to put yourself in a coma.

One night of stromboli will actually do you a lot of good.


for a printable recipe: go here
email me with questions and let me know how it goes!

p.s. there is an alternate way to make this with the frozen bread dough. You would just thaw it out all day, then roll it out like it says up there. But I never have that stuff around because I make my own dough a lot cheaper and simpler. I felt it was only fair to let you in on that bit of information.

Now go forth and conquer.

Love in Him,


**entry for 5 Minutes For Mom Food Fun Contest!

Friday, December 12, 2008

Fried Green Tomatoes (Mmmm Good)


Aren't they pretty? Just like my new blog design. Yes, go ahead and say it. You love it, don't you?

If you don't live in Texas, chances are you may not have any green tomatoes handy. I'm not known for my timely recipes around here. In fact, I'm not known for even posting monthly. But all that is about to change, folks. So here's a delicious recipe for you (by Carrie) and a promise that I'll be ever more present with the recipe production over here. After all - I'm being forced to get more domestic by this dratted economy. So I'm sure to be spending more time in the kitchen and finding more recipes that need to be added to my 'collection'.

The following recipe is one I snatched up from The Gremlin Wrangler in a pinch. I had over 40 green tomatoes and didn't want to waste them. Her photos and tips were the bomb. Even mom (who helped fry them) was impressed.

Be sure to let Carrie (who's getting all 'I'm not going to blog any more cuz I'm in a funk' on us today) know that you love her when you try her recipe. The sooner the better. We need to prevent her from taking herself and her comfort food recipes away from the blogosphere.

And CARRIE: If you are listening. I'll come and find you if you take your blog down and erase this recipe. You better leave this one up. There are a lot of people down here in the South that take fried green tomatoes pretty seriously. I'm just sayin'.


Subscribe to Gathering Manna by Email

Technorati Tags: , , , , , , , , , ,

Thursday, July 24, 2008

Corn Salad


Corn salad is such a nondiscript name. It just doesn't do this addictive dish justice. I could sit down with a bowl of this stuff and not come up for air until it was gone. Every kernel, baby. Gone.

There are friends of mine (and family members) that have been begging me for this recipe. And it all started with Nana, so I have to give her credit where it is due. She brought it over to our house one day and it has all been history since then. I make it for potlucks, family dinners, as a side-salad for taco night, and just to snack on. It truly is a wonderful and healthy (mostly) dish!

INGREDIENTS
(you can half the ingredients if you use a smaller bag of corn)
1 large bag of frozen corn - thawed
1 bag of chili frito corn chips
Mayo or Miracle Whip to taste (about 2-4 tablespoons)
1/2 red and 1/2 green bell pepper (or one of either that you prefer) - chopped
1/2 large red onion (some call them purple) - chopped
1/2 of a 1 lb. bag of sharp cheddar grated cheese
season with salt and pepper

INSTRUCTIONS
Mix all ingredients (except corn chips) together and chill. Start with a large tablespoon of mayo and taste as you go. I probably use two large heaping spoonfuls - depending on the amount of corn and veggies. The aim is to coat, not drown it!

Add corn chips to individual servings, crunched up and mixed in. The chili cheese flavor of the chips adds the zap and crunch the dish needs to be addictive... but they will WILT and get soggy if you put them in prior to eating. Keep the bag handy so you can add chips to your leftovers, too. If there are any, that is!

It doesn't sound magic, does it? But it is. You won't be able to put the spoon down after tasting it the first time. Go ahead. Make it - I dare you to resist.


Subscribe to Gathering Manna by Email

Technorati Tags: , , , , , , , , , ,

Tuesday, July 22, 2008

Southwest Migas Breakfast


Quick and easy, Migas are a super way to use up last night's taco leftovers. Fry them up with 2 eggs 'omelet style' and leave a dollop of sour cream, salsa, and guacamole on the side for dipping each delicious bite! Your mouth will thank you.

Here below are the ingredients for my own original Southwest Migas in the above photograph (but you can change it up to suit your own taste). Migas (a Texas favorite) are meant to use up leftover tortillas and are as unique as you are - never the same twice!

INGREDIENTS
Leftover corn, roasted pablano, and red onion salsa from last night's chicken tacos
Leftover cut cilantro from last night's chicken tacos
2 Leftover corn tortillas from last night's tacos (cut into small strips)
2 scrambled eggs
2 tblsp butter
salt
Hungarian hot paprika to taste
Leftover salsa from breakfast tacos out at our favorite restaurant
Leftover sour cream from last night's tacos
Leftover guacamole from dinner last night

See what I mean? The only thing new to the meal was the eggs and spices!

INSTRUCTIONS

Scramble the eggs in a small bowl, heat the skillet to medium high, melt the butter and pour the eggs on - flat across the pan. While still wet, toss in your leftover veggies and tortilla strips. Season the Migas with salt and hot paprika (and pepper if you want). You can use more seasoning if your veggies are fresh (mine already had seasoning from last night's taco meal). Flip when browned on the bottom. Curve over in half-circle when done and place on plate with dipping sauces. Serve with refried beans (if you have them leftover, too), fruit and tea. MMMMMmmmm! A Tex-Mex breakfast. The best way to start your day.


Subscribe to Gathering Manna by Email

Technorati Tags: , , , , , , , , , ,

Saturday, May 03, 2008

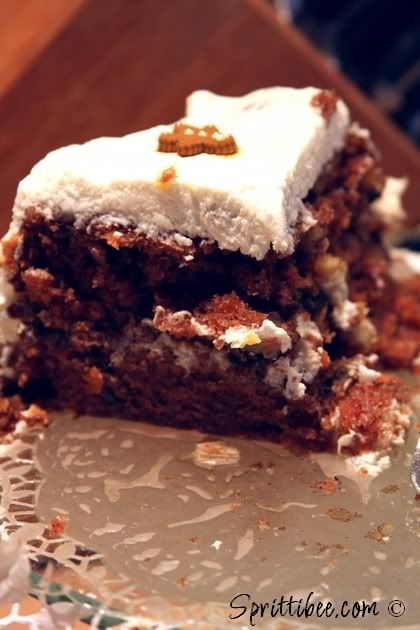
Kentucky Hot Brown and Carrot Cake


Both of those look great, don't they? I posted about them on my other blog. Sorry for neglecting you in here. I just haven't had the time to update it lately. I will come back in with some recipes soon. I promise.

Do any of you have a good recipe to share for a Kentucky Hot Brown? I'd love one.


Subscribe to Gathering Manna by Email

Technorati Tags: , , , , , , , ,

Thursday, March 06, 2008

Green Bean Casserole Anyone?

I've shared my green bean recipe before (well, actually it is Richard's recipe to begin with). My husband hates the traditional GBC (Green Bean Casserole), but my mother LOVES it. We make the old fashioned kind AND a few varieties around here. I enjoyed this post during the holidays at Blog Her. I know it is really belated, but I had it in draft mode in here and forgot about it until Spring. I love green beans in the summer months, too - so here are a few really early recipes for next Thanksgiving OR a few somewhat early recipes for this summer's green bean crop! Whatever floats your boat.


Subscribe to Gathering Manna by Email

Technorati Tags: , , , , , , , ,

Wednesday, January 16, 2008

Vermicelli with Parmesan

The Medieval Cookery site has a great recipe for making vermicelli with parmesan and butter. This goes well with any meal as a side-dish... and if you are like me, it also doubles as comfort food when you are by yourself and have to cook something quick just for one. I love pasta and cheese. Consider this a medieval mac-n-cheese dish.

While this recipe is far from exciting, it is simple to make and just about anyone will like it.

* vermicelli
* chicken broth
* parmesan cheese
* butter
* saffron

Boil vermicelli in broth. Drain and add butter, saffron and cheese. Serve hot.


Subscribe to Gathering Manna by Email

Technorati Tags: , , , , , , , , , Vermicelli

Monday, October 15, 2007

Buttermilk Biscuits

Another of my husband's favorite things to make. He uses a mixture of different flours for this... whole wheat, half wheat and half white; and every now and then, he'll make it with just white flour (the unbleached kind, of course). Make sure you fry up some turkey sausage and eggs to go with these or you'll be on a carb sugar-rush later. Especially if you use lots of jelly and honey on them! These are a Saturday morning breakfast kind of treat.

INGREDIENTS
2 cups all purpose flour
1 tablespoon sugar
1 teaspoon salt
2 teaspoons baking powder
1/2 teaspoon baking soda
1/2 cup vegetable shortening, chilled, cut into 1/2 inch pieces (we use butter)
3/4 cup buttermilk

INSTRUCTIONS
In a mixing bowl, combine dry ingredients together with a fork. Cut in the shortening using a pastry blender until mixture resembles coarse crumbs. Make a well in the center and add the buttermilk. Quickly fold dry ingredients into the buttermilk with your hands until a sticky dough forms.

Turn the dough out onto a floured surface. Gently fold dough over itself 3 or 4 times to create layers. Roll dough out to 3/4 inch thick. Cut with 3-inch biscuit cutter. Transfer dough rounds to a sheet pan. Gather scraps and repeat. Make a dimple in the center to help biscuits to rise evenly. Brush with butter. Bake for 15 minutes in preheated 400 degree oven until golden brown.

Wanna see what they look like? Click my previous breakfast post link here.

Yumm!

Original recipe from Food Network, courtesy of Tyler Florence on the 911 Food Show.


Subscribe to Gathering Manna by Email

Technorati Tags: , , , , , , , , , ,

Sunday, April 01, 2007

Quick Red Cabbage for the Cabbage Junkie


Want to know what I ate for dinner tonight? RED CABBAGE. Cooked to perfection. Nothing else. I had a half of a head of it in the fridge, looking so sad and lonely... so I went online and found an AMAZING FOOD BLOG with this wonderful recipe. I scanned her comments section and gathered up a few tips from the readers as well. Below is my tweaked version of The Recipe.

Now I know I have some Polish in me somewhere. Or is that Austrian? Or German? My husband is 1/2 Czech and his family jokes that I am more Slavic than he is. Maybe they are right? Just hand over the cabbage and nobody gets hurt!

Quick Red Cabbage for the Cabbage Junkie
...tweaked from "Sweet and Sour Red Cabbage" by Elise Bauer (and readers)

1/8 cup (1/4 stick) butter
1/2 red cabbage head, thinly sliced (about 6 cups)
2.5 Tbsp brown sugar
1/4 cup balsamic vinegar
1 clove garlic minced or finely chopped
salt and pepper to taste

Melt the butter in a large pot over medium-high heat. Add cabbage and sauté until slightly wilted, about 3 minutes. Add sugar, toss to coat evenly. Add vinegar. Reduce heat to low; simmer until cabbage is tender, stirring often, about 5-10 minutes. Season to taste with salt and pepper.

Serves 1 cabbage-freak-who's-eating-nothing-else-for-dinner (or 4 small-sized side-servings). You be the judge.

P.S. I love you Elise! So do my kids (who didn't have to eat any of it except for one bite... you see, you saved them from eating that "nasty-looking red stuff" because Mommy liked it too much to share).


Technorati Tags: , , , , , , , , , , , , , , ,

Thursday, January 04, 2007

My Husband's Buttermilk Pancakes

WARNING: This recipe will RUIN your diet!

I'll admit it. I'm a Bisquick pancake girl. I love the recipe on the back of the Bisquick box and have made those since I was a girl. My mother made them before me. I think my grandmother even used that recipe. Well, my husband decided that since I'm such a pain in the rear about not eating WHITE breads, he would go 'health-nut' on me and try to go back to basics with pancake mixes. He started making pancakes from scratch using whole wheat and healthy flours. We have tried a lot of different flours (rice, buckwheat, whole wheat, oat, etc) and you really have to experiment to see what works best for your family. Just be forewarned that you should most likely start by doing a half-and-half mix of what you are used to and the new healthier stuff... so you don't go in to shock and ruin a perfectly good Saturday morning meal! You can even make a bunch of these and freeze them for easy warm-up later when you are in a hurry. They are a bit heavy due to the buttermilk, but they really are tasty and it makes you feel good to know that there's no hidden powdered Crisco mixed in and the ingredients are ALL natural!

Ingredients
2 cups flour (non-bleached, non-bromated, organic if possible - be creative!)
1/4 cup sugar
2 1/4 teaspoons baking powder
1/2 teaspoon baking soda
1/2 teaspoon salt
2 eggs
2 cups buttermilk
1/2 cup melted unsalted butter (we use salted butter)
1 cup blueberries (optional - we usually don't use these)

Instructions
Sift flour, sugar, baking powder, baking soda, and salt. Beat eggs with buttermilk and melted butter. Combine dry and wet ingredients into a lumpy batter (do not over-mix). Heat some butter on a skillet on medium heat. Spoon 1/3 cup batter on skillet and cook until browned and firm on each side. Repeat butter on skillet and 1/3 cup batter, flipping each pancake until batter is used up. Eat warm with syrup (100% pure Maple is best!) and butter or freeze and re-warm.

Be sure to eat them with a little scrambled eggs and baked turkey bacon on the side so you don't have a carb crash later in the day!

* Variation (my favorite way to make them): mix in 1/4 cup of chopped pecans, a tblsp. of brown sugar, and tsp. of vanilla for a mouthwatering 'Southern' twist.


Technorati Tags: , , , , , , , , , , , , ,

Wednesday, November 22, 2006

Thanksgiving Meal Menu with Recipes

This is last year's Thanksgiving Menu that I cooked for our family of four. For the first time in my life, I had to make the entire meal myself - no potluck family get-together! It was a lot of work, but worth every bite. These recipes were gathered from various places. Credit is given where it is due.

I thought I would share these recipes in time for Thanksgiving (well, almost in time). I'll be making the sweet potato casserole this year (tomorrow night I will mix it up and I'll bake it Thanksgiving morning before we leave for lunch with friends). I'm excited that I don't have to do the rest of the work this year. I have a few parties to cook for other days before the holidays, so I am glad for a break on the big meals. We will be in Texas with family at Christmas time, Lord willing (and I'll have to refrain from stuffing myself until I pop). We come from a long line of Texas master-chefs on all FOUR sides of our family. This year we're making pumpkin pie cheesecake for a friend who can't eat nuts (even though our favorite is actually pecan pie). I'll share that recipe some time soon! If you can't live without it before Thanksgiving, email me.

I hope you have a wonderful holiday. What a blessing that we have freedom, food, health, family and friends. Let us all give thanks to the One who makes that possible. By the way, to all of the Native Americans out there... thank you for the wonderful foods that you brought to our tables (we would not have had so many wonderful dishes had it not been for your help), and please accept my humble apologies for any ill-treatment from the pioneers who came before me. I am a small bit Cherokee myself... and I often grieve over the sadness that this holiday may impart for some Native Americans. I hope we can all give thanks together - despite the evils of the past. May God forgive us and heal us all.


___________________________________


Thanksgiving 2005 Recipes

Better Homes and Gardens: All-Time Favorites (Grocery Store Softback)
Page 17
Roasted Chicken (1930) - (*also see Seasoning the Turkey recipe below)

Prep: 10 Min.
Roast: 1.25 Hours


1 3.5 to 4 lb. Whole Chicken
Salt (optional)
1 small onion, quartered
2 stalks celery, cut up
Cooking oil
Dried Thyme or oregano, crushed (optional)

Rinse chicken; pat dry with paper towels. If desired, rub inside of body cavity with salt. Place onions and celery in body cavity. Skewer neck skin to back; tie legs to tail. Twist wing tips under back. Place chicken, breast side up, on a rack in a shallow roasting pan; brush with cooking oil and, if desired, sprinkle with herb.

If desired, insert a meat thermometer into center of an inside thigh muscle. Do not allow thermometer to touch bone. Roast, uncovered, in a 375 degree over for 1.25 to 1.75 hours or until drumsticks move easily in sockets, chicken is no longer pink, and meat thermometer registers 180 degrees to 185 degrees. Remove chicken from oven; cover and let stand ten minutes before carving. Makes 6-8 servings.


Better Homes and Gardens: All-Time Favorites (Grocery Store Softback)
Page 60
Caramel Pecan Pumpkin Pie (1939)

Prep: 15 Min.
Bake: 45 Min.

1 recipe Pastry for Single-Crust Pie (p 55)
2 eggs slightly beaten
1 15-oz. can pumpkin
¼ cup half-and-half or milk
¾ cup granulated sugar
1 tbsp all-purpose flour
1 tsp finely shredded lemon peel
½ tsp vanilla
½ tsp salt
¼ tsp ground cinnamon
¼ tsp ground nutmeg
1/8 tsp ground allspice
½ cup packed brown sugar
½ cup chopped pecans
2 tbsp butter, softened

Prepare pastry and line pie plate as directed. In a large bowl, stir together eggs, pumpkin and half-and-half. Stir together granulated sugar, flour, lemon peel, vanilla, salt, cinnamon, nutmeg, and allspice. Pour pumpkin mixture into pastry-lined pie plate. To prevent overbrowning, cover the edge of the pie with foil. Bake in a 375 degree oven for 25 minutes.
Meanwhile, in a medium bowl stir together the brown sugar, pecans and butter until combined. Remove foil. Sprinkle brown sugar mixture over the top of pie. Bake for 20 minutes more or until a knife inserted near the center comes out clean and topping is golden and bubbly. Cool on a wire rack. Cover and refrigerate within 2 hours. Makes 8 servings.


Better Homes and Gardens: All-Time Favorites (Grocery Store Softback)
Page 55
Pastry for Single-Crust Pie (1930)

Prep: 10 Min.

1.25 cups all-purpose flour
¼ tsp salt
1/3 cup shortening
4 to 5 tbsp cold water

Stir together flour and salt. Using a pastry blender, cut in shortening until pieces are pea-size.
Sprinkle 1 tblsp of the water over part of the mixture; gently toss with fork. Push moistened dough to side of bowl. Repeat, using 1 tbsp water at a time, until all the dough is moistened. Form dough into a ball. On lightly floured surface, flatten dough. Roll from center to edge into a circle about 12 inches in diameter.

To transfer pastry, wrap it around rolling pin; unroll into a 9-inch pie plate. Ease pastry into pie plate, being careful not to stretch pastry.

Trim pastry to ½ inch beyond edge of pie plate. Fold under extra pastry. Crimp edge as desired. Do not prick pastry. Bake as directed in individual recipes. Makes 8 servings.


Husband’s Family’s Cookbook
Page 139
Broccoli and Rice Casserole
Submitted by Husband’s Mom

2 Cups Cooked Rice
1 stick Margarine or Butter, melted or softened
1 jar (8 oz.) Cheese Whiz
1 med. Onion, chopped
1 pkg. Chopped Broccoli
1 can Mushroom Soup

Combine all ingredients, put in casserole dish and bake at 350 degrees for 45 minutes or until bubbling in the center.

*note: recipe originated in a church cook-book and everyone insists that my husband’s mom makes it for Thanksgiving each year.


The Frugal Gourmet by Jeff Smith
Page 116
Black-eyed Pea Salad

½ pound black-eyed peas, soaked over-night, drained
4 green onions, chopped
¼ cup olive oil
1/8 cup white wine vinegar
2 tbsp lemon juice
Tabasco to taste
Salt and pepper to taste

Cook black-eyed peas in fresh water until tender but firm, about 45 minutes (if you substitute frozen, cook as directed on package - DO NOT USE CANNED). Drain. Combine all ingredients, chill, and marinate in refrigerator several hours before serving. Serves 4-6.


Internet Recipe (Lost the Link – Sorry)
Sweet Potato Casserole Bliss

2 eggs
½ tsp nutmeg
½ tsp cinnamon
3 cups canned sweet potatoes (not yams)
3 cups fresh sweet potatoes, cooked and mashed
1 cup evaporated milk (pet milk)
1 cup brown sugar
¾ cup butter
1 tsp. salt
1 cup corn flakes, crushed
1 cup pecans, crushed
½ cup brown sugar
¾ cup melted butter

Cook and mash fresh sweet potatoes to make 3 cups. Mix together with canned sweet potatoes, eggs, nutmeg and cinnamon. Add milk, brown sugar, and salt.

Pour into 13X9 inch casserole and bake 30 minutes at 425 degrees. Make topping of crushed corn flakes, pecans, brown sugar, and melted butter.

When done baking, put topping on and brown for another 15 minutes in 400 degree oven.


Best of the Best from Louisiana
Page 143
Seasoning the Turkey

Amounts depend on size of turkey:
Mixture of salt, black pepper and red pepper flakes
Garlic, chopped
Bell pepper, chopped
Pecan halves
Butter, cut into pats
Celery
Parsley

1. Rinse thawed bird and pat dry.
2. Puncture all meaty parts with the point of a knife to form deep but narrow pockets all over the bird. (Be sure to make many pockets all over breasts and thighs.)
3. Mix salt, black pepper and red pepper together.
4. Add chopped garlic and bell pepper to salt mixture.
5. Take small amount of this seasoning and push it down into pockets.
6. Now push 1 or 2 pecan halves into each of the slits.
7. Finish by putting a small pat of butter into each pocket.
8. Rub entire outside with salt, red and black peppers.
9. Season cavity with salt and pepper.
10. Add about 1/3 bunch of parsley, 1/3 bunch of green onions, and 2 or 3 pieces of celery.
11. Cook turkey as desired until tender.
12. The roasting process is not complicated, but timing is important. It takes several hours, whether turkey is cooked in a covered roasting pan or barbecued on a rotisserie.
13. Use the suggested roasting time on the wrapping, but 30 minutes before the end of suggested time, test for doneness. This can be done by inserting a meat thermometer deep into the thigh (not touching the bone). When thermometer reaches 180 to 185 degrees, the turkey is done.
14. Another way to tell is to protect the thumb and forefinger with a cloth or paper towel and pinch the thickest part of the drumstick. When done, the meat will be soft to the touch and the drumstick will move easily in the socket.

(The cookbook above also has a wonderful Louisiana style cornbread dressing with onion, parsley, green pepper, butter, cooked rice, chopped and boiled eggs, (optional oysters and chicken livers for those of you brave souls who like that kind of thing), chicken broth, some seasonings and a dash of Tabasco)


Family Recipe (Husband’s Step-Mom)
Nana’s Turkey Dressing

Large Mixing Bowl
3-4 boxes/packages of cornbread
White or wheat bread, dried and crumbled or stuffing bread cubes
Poultry Seasoning
Rubbed Sage
Salt and pepper
Pet or canned milk and a little plain milk
Chicken or turkey broth (1 or 2 cans if you use chicken)
Celery and onion to taste (browned in skillet with butter)
Boiled eggs, chopped – to taste
Shredded meat from the bird if desired

All ingredients above are to taste. Nana (my husband's step-mom) doesn’t use any measuring gear other than her eyes and hands. I thought my grandma’s stuffing couldn’t be beat, but I have come to savor Nana’s recipe as much (Shhhh! If not more. Don’t tell my grandma!) Here’s her instructions:

Cook cornbread. Brown onion and celery in a skillet with butter until golden and a bit soft. Boil eggs, peel and chop. Mix crumbled cornbread and bread crumbs (toasted or stale), poultry seasoning, sage, salt and pepper together in large mixing bowl. Pour in one can of chicken broth and one can of condensed milk/pet milk and stir… keep adding a little of each until you get the mixture to desired consistency. It shouldn’t be very thin, but also not very thick. Add onion and celery with eggs to cornbread mixture. Pour mixture into cake pan (and some into turkey or chicken cavity if desired). Bake in 400 degree oven for 30 minutes uncovered. Turn heat down to 375 degrees and test to see if stuffing is done to your liking. Some like it more moist, and others like it more dry. Fluff with a fork before serving.

Note: You can blend a bit of the ingredients from the Louisiana recipe above and add a little Thyme if you wish.


Family Recipe (Brother-in-Law)
Richard’s Sautéed Green Beans (a variation of the traditional green bean casserole)

Fresh green beans
Bacon grease or meat drippings from pan
Garlic to taste
Cooking oil to taste
Seasonings to taste (salt, pepper, red pepper flakes, Tabasco, whatever you like)
Worcester, Soy, or Teriyaki sauce (optional)
Sautéed fresh onion, thinly sliced or French’s Onion topping
Toasted Almonds (optional)
Cream of Chicken, Celery or Mushroom Soup (optional)

All ingredients above are to taste. If you use fresh green beans (preferred), you can steam them some before you begin cooking them with the other ingredients. If you use the nuts and fresh onions, toast/sauté them on the pan before you add the rest of the ingredients. Add all ingredients together on a pan with oil and meat drippings/bacon grease (to taste), and pan-fry until beans are desired consistency. Taste as you go, and add whatever you like.

___________________________________


Well, there you have it... all in one post. A couple of those recipes are elsewhere on the blog, but I thought it would be nice to put them in one place so you can print it easily if you want. Be sure to stop in and tell me if you made them this year for Thanksgiving or Christmas and let me know what you thought. ENJOY!


Technorati Tags: , , , , , , , , , , , , , , , , , , , , ,

Thursday, September 07, 2006

Spanish Rice


Spanish Rice is my very favorite food in the world. I usually play around with it and never measure when I cook it (because it was one of the first things I ever learned to cook and I've been making it so long now). My family jokes that each time we sit down to eat Mexican, my rice is a surprise - you never know what changes I've made to it "THIS TIME". There have been some times I have made it too hot, some times too mild, but it ALWAYS gets eaten. If not at dinner, the next day out of the refrigerator! I absolutely love it. I used to always try to make my grandma's version (Jessie's Spanish Rice)... but I have yet to copy it exactly (although it was wonderful and the reason I fell in love with it so long ago)! Maybe I'll share HER recipe some time in here also. I still keep her hand-written recipe she gave me when I was in my 20's in my recipe binder. Everyone loved her Spanish Rice.

Let me tell you what I don't like in Spanish Rice, and we'll start from there:

1. lots of tomato paste - GROSS!
2. most boxed Spanish Rice mixes (not good for you, and usually not the flavor I'm looking for)
3. bland rice (sorry, I like some spice)
4. too hot to eat (I have made this mistake a few times, and it is better to go a little light and add your spice at the table than end up with a pot of tongue-melting rice that no-one can eat... what a WASTE!)

Next, I'll tell you my recipe, and then we'll discuss some additional variations/ingredients you might try. Remember that my Spanish rice is always morphing and changing... but this is the recipe for last night's batch, and I FORCED myself to measure it for you! You are so lucky that I'm sharing this! You should feel so special!

Sprittibee's 2006 Spanish Rice Recipe

  • 1.5 cups rice (or a touch less... last night I used par-boiled because it was on hand)
  • 2 tbsp oil
  • 5-6 twists of black pepper grinder
  • 1/2 cup chopped onion
  • 2 cups water
  • 1 tsp garlic powder (my grandma always said this was the key ingredient)
  • 1/4 tsp cumin powder
  • 1/8 tsp coriander powder
  • 1/8 tsp cayenne powder
  • 1/2 tsp salt and 1/2 tsp garlic salt
  • 1/4 tsp sweet Hungarian paprika (or you could use hot Hungarian paprika)
  • 1 tsp Knorr Caldo de Tomate (Tomato Bouillon)
  • 1/4-1 tsp chili powder
  • 1/3 cup chopped fresh tomato
  • pinch saffron
  • dash Mexican oregano
  • 1 tsp ketchup
  • large frying pan with high sides and a tight-fitting lid


Note to chef: It is best to start your recipe with hot oil and your veggies already cut up. I like to go ahead and prepare my water also, so that you can prevent any loss of time when you need to add it and keep the rice from burning. This recipe, despite it's long list of ingredients, moves rather quickly! If you gather all of these spices and a few sets of measuring spoons on the counter near the pan, you can throw them in quickly and save yourself from allowing the rice to get too browned (or burnt).

Instructions:

Heat oil in pan. Add rice, pepper, onion, and garlic powder. Stir rice to coat and fry on medium-high, keeping the rice moving so it will brown evenly. As you are stirring, start adding spices (cumin, coriander, cayenne, salt, garlic salt, paprika, chili powder). When rice is browned a bit (some of it may not be browned - it is hard to get it totally even in color) and before it starts to burn, add your water. Stir well. Add tomato bouillon and tomato. Add your pinch of saffron and turn heat up to high. Add your dash of oregano (very small amount) and ketchup. Allow rice to come to a rolling boil while stirring (won't take long). Turn heat to low and place lid on pan to seal. Cook for around 20 minutes (see note below)...

Note to chef: Depending on your stove and the type of rice you use, you may need to add additional water and/or turn up the heat some. You may also need to stir it once in-between sealing the pot and it being completely done. Par-boiled rice takes less time to cook (about 15 minutes), while longer grains like basmati takes up to 35 or 40 minutes to cook. Adjust your cooking time depending on your rice and stove and watch it closely for the first few times you make it.

Variations:

I have been doing different things to my Spanish Rice since I've been cooking. It is hard to really mess it up unless you accidentally burn it or add too much spice that is HOT. Other ingredients I have used in the past include:

  • 1/2 to a full chopped jalapeno pepper
  • dash of red pepper flakes
  • spoonful of your favorite hot sauce
  • handful of kernel corn
  • handful of chopped fresh red bell pepper (fried along with onions & rice in the beginning stages of the dish to soften it) OR spoonful of red pemintos from a jar (added at the end)
  • fresh garlic
  • bit of shredded carrot
  • handful of fresh chopped cilantro leaves sprinkled on top before serving (mmm!)
  • ... my favorite addition is vermicelli (similar to the long pasta "grains" in Rice-a-Roni, and you only add about a fourth cup per 2 cups rice)


Warning: The tomato bouillon has MSG and other things bad for you. I was told to use it by a Spanish woman in Houston, Texas who cooked for many people and sold her rice at a food stand. After trying it, I have had a hard time giving it up... so I figure a little bad won't kill me, right? I eat healthy for the most part.

Please drop a note in my comments section if you try my rice and let me know what you think!


Technorati Tags: , , , , , , , , , , , , , ,

Monday, June 19, 2006

Authentic Italian Risotto with Chicken

I love trying new recipes... especially if they seem like old favorites. Risotto is one of those mouth-watering comfort foods that you just have to love. It's like a glorified chicken and rice dish that is all grown up. It may not be that pretty, but hardly a grain is left in the pan after everyone fights for the last spoonful. My friend Ammie (who's husband is from Italy) made this the last time we visited her. I called her up craving it and she graciously gave me her recipe. We made it... and it turned out beautifully. I thought I would share her authentic Italian recipe with you!

This risotto recipe is with chicken, a bit of rosemary, a dash of garlic salt and white wine. However, there are as many risotto recipes as there are American recipes for Thanksgiving Turkey. I plan to cook it with mushrooms next... but my family prefers the chicken.

It's important that you follow Ammie's steps, because Risotto is a dish that requires a lot of babysitting. Read them all below before you begin. I took the liberty of adding the ingredient amounts (because Ammie doesn't measure), and they fit our four person family just perfectly. You'll have to adjust it if you have more people to feed.

Ingredients:
1 cup Risotto Rice
(best to use the genuine thing, however, if you MUST substitute, use short grain - never long or parboiled)
Olive Oil
1 Quart plus 1 14 oz Can of Chicken Broth
(plus a few tablespoons of water - optional)
Onion (1/2 or small)
1 Fully cooked Rotisserie Chicken
(or pan-fried tenders lightly seasoned with Rosemary, Garlic Salt and Pepper)
2/3 cup Freshly grated Parmesan Cheese (no powder!)
1/4 Cup whole or 2% Milk
1-2 Tablespoons of Butter
1/4 Cup Dry White Cooking Wine
Salt and pepper to taste


Instructions:
Step 1 - Put your chicken broth and water on the stove to boil (heat to hot). You can't use cold broth or the rice will take too long to cook and be mushy. You'll need a ladle or measuring cup to scoop and put broth in pan later. Chop your onion.

Step 2 - Heat about 2 tablespoons of oil and the butter in a large skillet (cast iron works well, but any will do) and add your onion. Sauté until slightly tender and add rice. Coat rice well with oil and let sizzle and toast well.

Step 3 - Pour your white wine in and stir well. Pour two ladles (about 1.5-2 cups) of HOT chicken broth into pan and stir rice well. The point is to keep the rice moist with broth, cooking it over medium-high heat and put another ladle of broth in just as the previous ladle is cooking out. Never let the rice dry out or burn, but don't smother it with liquid, either. You don't use a lid to cook this rice, and it takes about 30 minutes from the time you first start putting liquid on the rice until it is completely finished. The final result will be a creamy (but not mushy) rice mixture. You'll need to be available to stir often, especially right after you spoon the broth in. There's about 5-8 minutes in-between ladles depending on your stove; which is plenty of time to make a salad or other green vegetable on the side. You can also fry and tear up your chicken or pick it off the rotisserie bone and prepare it to toss into the rice.

Step 4 - Toss chicken in with rice when it is almost finished cooking.

Step 5 - When you are down to your last 1/4 cup of broth and the rice is done, pour that in and turn the stove off - leaving the pan on the heat. Add in your milk and about 3/4 cup parmesan cheese. Salt and pepper to taste and stir well.

Step 6 - Enjoy!

Goes well with peas, green beans, salad, and crusty bread.


Technorati Tags: , , , , , , , , , , , , ,

Sunday, January 22, 2006

Indian Rice Pudding

I am sitting here eating a bowl full of this right now, and it is very good. I tend to over-eat this when we eat out Indian Food OUT... so this might have been a dangerous move to cook it at home. With a whole pot waiting to devour in the ice-box, my weight loss goals might be pretty far fetched, eh? I have been wandering about with this bowl in my hands muttering in my finest Hindi accent... "I am going to eat rice pudding until I puke. Thank you my friend. Yes." I have made some marginal changes to the recipe after cooking it tonight. Feel free to surf for a few to compare this one to.

Indian Rice Pudding Recipe (Kheer)

INGREDIENTS
  • 1/2 cup basmati rice
  • 3/4 cup water

  • 1 quart half-and-half (I would use 1/2 the amount and maybe a cup of milk)
  • 1/2 cup sugar (I would add a bit more sugar, but not quite 3/4 cup)

  • 1/2 teaspoon cardamom (remove seeds from enough pods to measure 1/2 teaspoon - about six small green pods)

  • 1/4 cup chopped FINELY GROUND pistachio nuts (I would use 2 tablespoons, reserving 1 of them for sprinkling on top of the dish instead of mixing all of them in to the pudding)

  • 1 teaspoon rosewater (1/2 teaspoon is plenty)

  • You can also add in a tablespoon of golden raisins or dried currents (we like both)

READ THIS CLOSELY BEFORE YOU START:
This recipe requests for two ingredients that are NOT in most American supermarkets
without some searching. You can get rosewater and whole cardamom pods (fresh ones) at a Jerusalem Market or an Indian Market. Buy the green cardamom pods for this recipe. They are easy to crack open with your fingers and you just empty the contents into the rice and milk mixture when the recipe calls for it. If you can not find the rosewater, you can leave it out. I don't think it will alter the flavor much. Also important: YOU NEED TO START THIS DISH BEFORE DINNER IS COOKED because it requires an hour of simmering time, ten to twenty minutes of cooling time, and an additional hour or two of chilling time (about 3 or 4 hours from start to serve). I would start it after lunch if you were going to serve it for dinner. Or, be a real organized chef and cook it the night before!

INSTRUCTIONS:
Wash rice well and soak in water to cover generously for 15 minutes. Drain rice. Place rice in saucepan, adding 3/4 cup of water and bring to a boil. Reduce heat, cover and cook gently until rice is tender and water is absorbed (10-15 minutes). Drain any remaining water off of rice. Stir in the cream, sugar and cardamom seeds. Stir continually while you bring mixture to a boil. If milk burns on the bottom of the pan, you will have nasty black stuff floating in your pretty white pudding (so be attentive). Reduce heat and simmer for ONE HOUR uncovered (stirring to prevent sticking about every 5-10 minutes). Don't try and hurry (or skip) this part - it is essential to the flavor of the dish. Cool the pudding on a cold burner. Stir in pistachios and rosewater. Chill for around an hour. Pudding should be served cold (stir when ready to serve in case pudding films over in the refrigerator).

Recipe Adapted from Cooks Recipes.

Thursday, December 15, 2005

Lasagna #2

This recipe is out of my husband's family cookbook. I made it the other night, and it was really good. I hope you enjoy it, too. My husband calls this "reunion lasagna" because it makes a HUGE amount. It's a good dish to split into two smaller pans if you are cooking for a sick friend at church. You can make one meal and serve two families of 4.

INGREDIENTS:
1 pound of ground beef (recipe says up to 2 lbs., but I think that's overkill)
1 clove minced garlic
1 tablespoon parsley flakes
1 tablespoon basil
1 teaspoon salt
1 can crushed tomatoes (16 oz)
- or you can crush your own after peeling
2 cans tomato paste (I used one, and felt it was plenty)
10 oz lasagna noodles or 8 noodles (we use whole wheat)
24 oz large curd cottage cheese (or small curd - doesn't matter)
2 beaten eggs
1 teaspoon salt
1/2 teaspoon pepper
1/2 cup parmesan cheese
1 pound (16 oz) mozzarella cheese in thin slices
(deli cheese works great)

INSTRUCTIONS:
Brown meat and drain if greasy. Add next 6 ingredients. Simmer uncovered about an hour (great time to make a salad). Cook noodles in water. Drain noodles and swipe them each with a little butter so they won't stick together and tear. Leave them aside in a strainer until ready for them. Combine cottage cheese with next five ingredients.

Place half of noodles in a greased 13X9X2-inch dish (or throw-away foil lasagna pan). Spread half cottage cheese mixture on top of noodles. Lay 1/2 the mozzarella cheese slices on next. Pour 1/2 meat mixture on top of cheese slices. Repeat layers. Sprinkle parmesan cheese on top of last meat layer.

Bake at 375 for 30-40 minutes. You may freeze and use later. Bake longer if frozen first. Let stand 10 minutes before serving. Serves 8 people.

Tuesday, November 22, 2005

SWEET POTATO RECIPES

Perhaps the most common time of year for Sweet Potatoes to be consumed in America is at Thanksgiving Dinner. They are truly tasty tuberous roots. I hated them as a child, but have grown to love them, and even to crave them as an adult. Here are a few recipes that I think any sweet potato lover should have in their collection. I have not tried them all, so please leave comments as you cook them. I will do the same. I have also discovered a recipe book that is put out by a homeschool farm co-op that attends book fairs each year all over the country. As soon as I find a link to the book, I'll come back in and update this post.

The first recipe (Sweet Potato-pecan Coffeecake) is a favorite of mine... it is mouth-watering. I plan to make the last recipe (Sweet Potato Casserole) for Thanksgiving Dinner in our house this year. I'll pop back in to comment on how it went!

RECIPES:
********************************************************
Sweet Potato-pecan Coffeecake (as found on the internet)

"I have collected hundreds of sweet potato recipes over the years,
I bake and cook with them very often, and always have sweet potatoes
frozen in my freezer, ready to use in a recipe, I usually purchase
them on sale... cook, mash and freeze them .... it is an ingredient
that makes any cake bake out very moist...this cake is definately a winner."

CAKE
10 tablespoons butter, melted
3/4 cup sugar
2 large eggs
1 teaspoon vanilla
1 cup sour cream
3/4 cup cooked mashed sweet potatoes (cooked without any added ingredients)
2 cups flour
1 teaspoon baking powder
1/2 teaspoon baking soda
1/4 teaspoon salt

TOPPING
1 cup pecans, chopped
1/2 cup light brown sugar
1/2 cup flour
3 tablespoons butter, softened
2 teaspoons vanilla

1 9inch springform pan Change size or US/metric
Change to: 9inch springform pan US Metric

INSTRUCTIONS
1. Set oven to 325 degrees.

2. Set oven rack to second-lowest position.

3. Grease a 9-inch springform pan.

4. In a mixing bowl, combine butter sugar, eggs and vanilla; add in
sour cream and mashed sweet potatoes.

5. In a large mixing bowl, combine flour, baking powder, baking soda
and salt.

6. With a wooden spoon, stir in sour cream/butter mixture into flour
mixture, just until blended.

7. Spread in prepared pan; sprinkle with topping.

8. Bake 65-75 minutes, or until cake tests done.

9. Let cool.

10. Loosen edges; remove sides of pan.

11. To make topping: In a small bowl, combine all topping
ingredients; mix with a fork until mixture resembles coarse crumbs.

1 hour 25 minutes 20 mins prep

********************************************************
Jazz Fest Sweet Potato Pone (as found on the internet)

"For some, Jazz Fest can be a religious experience.
For locals, it is a yearly pilgrimage and for myself,
Sweet Potato Pone is the holy grail. I am still working
on the crunchy, crumbly "crust" but this recipe for the
filling is the closest I have come to the real deal.
If you are ever in the neighborhood of New Orleans during
late April or early May, stop by Jazz Fest and try out the
Pone. It will be in the same vendor tent as the Greenbean
Artichoke Casserole. Or you could just try mine! Cook time
includes the time to bake the Sweet Potatoes."

INGREDIENTS:
2 1/2 lbs sweet potatoes
1/4 cup melted butter
2 eggs
1/4 cup dark brown sugar, firmly packed
1/2 cup milk
1 1/2 tablespoons vanilla extract
1/4 cup light molasses
1/2 teaspoon salt
1/2 teaspoon cinnamon
1/4 teaspoon nutmeg
1/8 teaspoon cloves
1 teaspoon grated orange zest (do not include the white pith, which is bitter)

6-8 servings Change size or US/metric
Change to: servings US Metric


INSTRUCTIONS:
*Preheat oven to 375°F.
*Cook the potatoes unpeeled until tender throughout.
*Let cool, Peel and mash the potatoes, then stir in melted butter.
*In a bowl, beat the eggs, add sugar.
*Add milk, vanilla, molasses, salt, cinnamon, nutmeg, cloves and orange zest.
*Beat until well blended.
*Stir into mashed sweet potatoes, then mix until well blended.
*Place the mixture into a buttered 1-1/2 quart baking dish.
*Optionally, you may sprinkle the top of the pone with additional brown sugar.
*Cover with foil and bake for 50 minutes; uncover, then bake for 10 minutes.
*Allow the pone to cool completely before serving.

2 hours 15 mins prep

Recipe Comment from Above Linked Site:
"Kari, I’m so glad you dared me to make this recipe! Not only was it very easy to make, but the taste was fantastic. I loved the subtle lemon taste…it was a perfect accompaniment to the sweet potatoes. I also liked the fact that all the ingredients (except the sweet potatoes) were ones that I always have in my pantry...no searching for hard to find ingredients. My son loves sweet potatoes and has asked me to cook this recipe again next weekend. What I really couldn’t believe though was my 3 year old eating two helpings (this is a child that eats as little real food as possible)! I served this with baked ham, blackeyed peas and cornbread. For dessert, we had blackberry pie with vanilla ice cream. It was a truly delicious Southern meal!"

********************************************************
Skillet Candied Sweet Potatoes (as found on the internet)

INGREDIENTS:
1 cup sugar
1/4 cup water
1/4 cup butter
1/2 tsp. salt
6 sweet potatoes, cooked and peeled

INSTRUCTIONS:
Mix together the sugar, water, butter and salt in heavy skillet.
Cook until mixture boils and sugar dissolves.

Slice cooked sweet potatoes in half lengthwise and add to the skillet.

Cook slowly, turning occasionally, about 20 minutes, or until potatoes
have a caramel-like glaze.

********************************************************
Sweet Potato-Banana Casserole (as found on the internet)

Calhoun County Extension Recipes - Mississippi

4 medium sweet potatoes
1/2 cup chopped nuts
4 tablespoons butter or margarine
3/4 cup brown sugar
1/2 cup coconut
4 bananas, mashed
1 cup crushed corn flakes
2 tablespoons butter or margarine, melted
1/4 cup brown sugar

Cook potatoes in small amount of water until tender. Mash and beat.
Add nuts, 4 tablespoons butter, sugar and coconut.
If the mixture is dry, add either a little cream of orange juice to moisten.
Pour 1/2 of the sweet potato mixture into a buttered casserole.
Cover with mashed bananas and then top with rest of sweet potato mixture.

Combine crushed corn flakes, 2 tablespoons butter and brown sugar.
Cover top of sweet potatoes.

Bake at 350 degrees for 20 minutes.
Serves 6 to 8.

********************************************************
SWEET POTATO CASSEROLE (as found on the internet - can't find link, sorry!)

INGREDIENTS:
2 eggs
1/2 tsp. nutmeg
1/2 tsp. cinnamon
3 c. canned sweet potatoes (not yams)
3 c. fresh sweet potatoes, cooked
1 c. evaporated milk
1 c. brown sugar
3/4 c. butter
1 tsp. salt
1 c. corn flakes, crushed
1 c. pecans, crushed
1/2 c. brown sugar
3/4 c. melted butter

INSTRUCTIONS:
Cook and mash fresh sweet potatoes to make 3 cups.
Mix together with canned sweet potatoes, eggs, nutmeg and cinnamon.
Add milk, brown sugar, butter and salt.

Pour into 13 x 9 inch casserole and bake 30 minutes at 425 degrees.
Make a topping of crushed corn flakes, pecans, brown sugar and melted butter.
When done baking, put topping on and brown for 15 minutes in 400 degree oven.


HAPPY THANKSGIVING - GOD BLESS YOU AND YOURS!