Showing posts with label easy. Show all posts

Sunday, January 24, 2010

Leftover Taco Casserole


What better to do with leftover taco stuff than put it in a pie?

Just layer your meat, rice & beans on the bottom after you spray your glass pie dish with Pam. Then sprinkle your pico or chopped tomatoes on top. Add a can of chilies if you like it spicy. Layer on the broken tortilla chips and coat it all with cheddar or Mexican cheese.


I think I used tortilla strips on the bottom of this particular leftover taco pie. I usually serve mine with a little side salad and sour cream for dipping... and extra corn tortilla chips.

Leftovers with style.

Hot taco pie.

FIN

Wednesday, April 15, 2009

No Bake Cookies: Your Butt Will Hate You

IMG_4550

The other day I got a craving for a little gem of a cookie that I hadn't made for years. I see them at The Market where I work and I endure a fierce battle in my mind every time a customer comes through with a pack of them. Because I've lost 15+ pounds in the last few months and those cookies are The Devil.

But then I got sick and had my girly time (sorry boy readers) at the same time and well, my defenses were down. I made the cookies. In fact, I made them twice. Only the second time, I did remember to take pictures so the 2% of you who have never made these can see how it's done.

IMG_4525

The beauty/evil of these cookies is that they are super quick: to make and to eat mass quantities. And most of us have the stuff in our cupboards already. DRAT! It's too easy!! You can find the recipe I used here. But I have to say I was bummed because I used to have one from my grandmother for these and it's now in the same wormhole as a couple remotes I lost and one of my favorite striped socks from last winter.

Here you can see you'll need milk, butter/margarine, peanut butter, chocolate chips, quick oats, vanilla, and SUGAR.

IMG_4528

I do this the lazy way. I use one big pot and mix it all in there. I hate washing dishes,so it's not likely I would use another bowl unless someone was holding a knife to my throat. Anyway, throw the stick of butter in there, along with the milk...

IMG_4529

...and the massive amount of sugar.

IMG_4534

Then stir it a little and bring it to a rolling boil. That means boil the heck out of it. This is VERY important: once it really starts boiling hard, set your timer for one minute. You absolutely MUST boil it hard for one minute. No less. Or else they won't set until the next day and everyone will be eating goopy cookies from a plate with a fork. Not that I would know anything about that.

IMG_4536

After a full minute has passed, quickly add the other stuff in. The recipe I used says peanut butter is optional. They blaspheme. Peanut butter is NEVER optional. I spit on you Optional Peanut Butter Fools! Unless you are someone who will suffocate from peanut allergies, then I guess that would be cool to leave it out. We don't want any of that going on.

IMG_4539

Add the oats. Which are the only healthy thing going for this cookie. It's because of the oats that I am duped into eating mass quantities every time I make them.

IMG_4541

You'll want to finish stirring the rest of the stuff in there quickly because if you boiled properly, this stuff will already begin to harden a bit. So don't mess around. No texting or twittering or Facebooking or plucking chin hairs in between the steps.

IMG_4544

Get some wax paper and plop some globs onto it. Don't make them too big or they'll set slower. Then you have to wait to eat them. That stinks.

IMG_4551

I've had varied results with the setting time. Sometimes they set within 15 minutes. Sometimes they don't set until the next day. They say that has to do with the boiling thing. I say it has to do with the economy. Why not? Everyone blames everything else on that.

IMG_4555

One should really work out after eating these. I'm just saying. But I've been sick, so I haven't worked out. And I ate a lot of them. I have a feeling you will too. They were totally worth it.

Love in Him,

Tuesday, October 14, 2008

Sopapilla Cheesecake

We really like this recipe... but let me warn you in advance, it fits NOWHERE on any diet plan. You can't beat how easy it is, though. It is a great dessert for a church function and goes perfect with a Mexican meal.

I couldn't tell you where the recipe originated. I have two friends that both gave me the same one, though - so I would say that there are plenty of people passing it around!

Sopapilla Cheesecake

Ingredients:
3 packages (8 oz) Cream Cheese – softened
2 packages Crescent Rolls (8 count per can)
1 ½ cups Granulated Sugar
1 tsp. Vanilla 1 stick Butter – melted

Topping:
½ Cup Granulated Sugar
2 tsp. Cinnamon

Instructions:

Preheat oven to 350 degrees. Grease 13x9 baking pan (I used PAM).

Whip Cream Cheese, Sugar and Vanilla in large bowl. Unroll 1 package Crescent Rolls and place in the bottom of the baking pan.

Spread Cream Cheese mixture over Crescent Rolls. Top with 2nd package Crescent Rolls.

Pour Melted Butter over top. Mix Topping ingredients together and sprinkle over the top.

Bake at 350 degrees for 30 minutes. Refrigerate before serving.


Subscribe to Gathering Manna by Email

Technorati Tags: , , , , , , , , , ,

Thursday, July 24, 2008

Corn Salad


Corn salad is such a nondiscript name. It just doesn't do this addictive dish justice. I could sit down with a bowl of this stuff and not come up for air until it was gone. Every kernel, baby. Gone.

There are friends of mine (and family members) that have been begging me for this recipe. And it all started with Nana, so I have to give her credit where it is due. She brought it over to our house one day and it has all been history since then. I make it for potlucks, family dinners, as a side-salad for taco night, and just to snack on. It truly is a wonderful and healthy (mostly) dish!

INGREDIENTS
(you can half the ingredients if you use a smaller bag of corn)
1 large bag of frozen corn - thawed
1 bag of chili frito corn chips
Mayo or Miracle Whip to taste (about 2-4 tablespoons)
1/2 red and 1/2 green bell pepper (or one of either that you prefer) - chopped
1/2 large red onion (some call them purple) - chopped
1/2 of a 1 lb. bag of sharp cheddar grated cheese
season with salt and pepper

INSTRUCTIONS
Mix all ingredients (except corn chips) together and chill. Start with a large tablespoon of mayo and taste as you go. I probably use two large heaping spoonfuls - depending on the amount of corn and veggies. The aim is to coat, not drown it!

Add corn chips to individual servings, crunched up and mixed in. The chili cheese flavor of the chips adds the zap and crunch the dish needs to be addictive... but they will WILT and get soggy if you put them in prior to eating. Keep the bag handy so you can add chips to your leftovers, too. If there are any, that is!

It doesn't sound magic, does it? But it is. You won't be able to put the spoon down after tasting it the first time. Go ahead. Make it - I dare you to resist.


Subscribe to Gathering Manna by Email

Technorati Tags: , , , , , , , , , ,

Thursday, June 19, 2008

Berries and Cream

With summer here, I thought maybe I'd give you a quick, healthy, usable recipe. Well, healthy if you use the honey - not the sugar! I know I completely neglect this site, but I'm going to TRY and do BETTER. I have about four recipes that I am just itching to get in here... but haven't had time to breathe lately. Yesterday Kaden had a root canal on his #9 front tooth and we've had house guests and things to do... I assure you that Kaden's root canal had nothing to do with the fact that it was a "sweet tooth". He has cement teeth like me... but apparently they chip on playground equipment while playing dodge ball. I never really understood the concept behind dodge ball, anyway... and it certainly isn't worth thousands of dollars worth of dentistry, eh? Just to get hit by a ball in the head? Children are crazy.

OK... The recipe!

Something sweet and simple for summer... something we discovered by chance a few weeks ago after a loving family member brought us a bag full of blackberries...

Berries and Cream

Ingredients:
berries (any kind - blackberries are what we used)
2 % milk (or whole milk)
Sugar (to taste)
Honey or Agave Nectar (optional or substitute)
Vanilla (just a bit)

Tools:
French Press
Spoon and bowl for eating

INSTRUCTIONS:
Here's the trick... take your cold milk and put it in the French Press. Pump the press until the milk is foaming and creamy. Pour it into a bowl and stir in the sugar, vanilla and honey if you want it. Taste as you go to see if you like the flavor. Start with small amounts until you get the milk to taste the way you want it. Blend in the berries, mix and eat!

I was so impressed with the way the French Press creams the milk! My husband is really excited that his French Press has found a purpose. He bought it and hated the way it made coffee, but now he uses it almost daily to foam milk for his morning espresso that he makes on the stove top.

Try it and let me know what you think!

Happy summer eating!


Subscribe to Gathering Manna by Email

Technorati Tags: , , , , , , , ,

Wednesday, December 26, 2007

Too Easy Black Beans

Yes, I know that using canned beans isn't exactly gourmet... but when you are in a hurry to get dinner on the table and are making a few other things that require your full attention, canned beans sometimes happen. Here's a way to slip a can of beans into your meal without having to feel ashamed.

INGREDIENTS
1 can black beans (your favorite brand)
1 teaspoon olive oil or butter
2 cloves of Garlic
1 serrano chili
handful of chopped onion
1/2 teaspoon of cumin
1/4 teaspoon coriander powder
1/4 teaspoon of Mexican oregano
salt and pepper to taste
1 teaspoon of sour cream

INSTRUCTIONS
Pour the beans into a small pot - juice and all - and simmer on low heat. In the mean time, use a small skillet and the olive oil or butter to fry the serrano chili, garlic and onion until onion is tender. Scrape pan off into black beans (being sure to include any run-off oil). Add spices and sour cream, continue to cook on medium low until bubbly. Remove from heat and serve.


Subscribe to Gathering Manna by Email

Technorati Tags: , , , , , , , , , Food and Drink

Thursday, April 26, 2007

BBQ Chicken with Cabbage Pear Slaw


This one is from a magazine (Family Circle - April 2007, page 124). It is a springish-summerish type meal. It is a really quick and easy dinner if you are in a hurry. I love red cabbage, so I enjoyed it. You can use any type of pear. We used Asian pears. We also made twiced baked potatoes with this. I'll try and get that recipe up tomorrow if I have time. Enjoy!

Makes 4 Servings
Prep 15 minutes
REFRIGERATE 2 hours
Bake 450°F for 30 min.

Ingredients
3 tablespoons light mayo
2 tablespoons milk
2 tablespoons cider vinegar
1 teaspoon sugar
1 teaspoon salt
1/8 teaspoon celery seeds
1 tablespoon plus 1/4 cup of BBQ sauce
1 bag (8 oz) shredded red cabbage (or small head chopped - about 4 cups)
1 bag (8 oz) shredded carrot (about 3 cups - chop how you prefer)
2 large pears (1 lb.) cored and cut in thin strips
4 boneless, skinless chicken breast halves (1.25 lbs)
1/4 teaspoon black pepper

Instructions
1. Blend mayonnaise, milk, vinegar, sugar, 1/2 teaspoon of the salt, celery seeds and 1 tablespoon of BBQ sauce.
2. In a bowl, mix cabbage, carrots and pears. Top with mayo mixture. Toss and coat. Cover and refrigerate at least two hours.
3. Heat oven to 450°F. Place chicken breasts on a rack over a baking sheet. Remove 2 tablespoons of BBQ sauce into a bowl and use a basting brush to brush it generously on your chicken breasts (covering all sides). Sprinkle with remaining 1/2 teaspoon of salt and pepper. Bake at 450°F for 30 minutes or until internal temp of chicken registers 155°F on an instant read thermometer. Remove from oven and spoon reserved BBQ sauce over chicken. Serve with 1 1/2 cups slaw per person.


Technorati Tags: , , , , , , , , , , , , , , , ,

Friday, March 09, 2007

Quick Mexican Casserole

This is ready in a flash. It is a super way to use up leftover hamburger meat (you can make it with half of the required amount and it is still really good). This recipe is a keeper for a hurried mama who wants to get out of the kitchen quick.

Mexican Casserole #2 (from family recipe book!)

1 lb. ground beef
1/2 chopped onion (I freeze my onions chopped and just grab a baggie to cook with)
1 package taco seasoning mix
5 large tortillas (I use whole wheat)
1 can refried beans
8 oz. shredded Monterey Jack or Colby-Jack cheese
1 can Rotel (drained)
1 can diced chili peppers (drained)

Fry up your taco meat with some onion and taco seasoning (don't drain the grease). Set to the side when cooked. In a greased 9x9 casserole pan, place 2 tortillas on the bottom to cover bottom of pan. Add refried beans and spread as well as you can across bottom. Add Rotel tomatoes mixture sprinkled in a layer on top of beans. Sprinkle 1/2 of the cheese over the Rotel in a layer. Place 2 more tortillas as a layer on top of the cheese. Spread the taco meat, onion and grease on top of the cheese. Spread chilies on top of that. Top with 1 tortilla (or 2 if you like it to look even) and cook dish for 15 minutes at 350 degrees F. Pull the dish out of the oven at 15 minutes and add the rest of the cheese. Cook for another 15 minutes and serve hot with taco chips, salsa, iced tea and a side of cold black olives! A salad also goes nice if you are trying to feed a crowd.


Buzz Words: , , , , , , , , , , , , ,

Friday, January 12, 2007

Welfare Burgers

This is Hillybilly Housewife's recipe and my kids absolutely love it. These hamburger patties go great with my baked green beans (recipe to come next). My children say these burgers and my baked green beans should be fixed 'once a week' because it is their 'favorite'. I have linked to this recipe before on Hillbillly Housewife's site... but I emailed her and got her permission to add it to my collection... and here it is:

Welfare Burgers

Ingredients
1 pound ground beef1/4 cup warm tap water
1/3 cup dry oatmeal or bread crumbs (love the oatmeal!)
1/4 cup finely chopped onion (used red onion because it is sweeter)
1 or 2 cloves garlic, minced
1/2 teaspoon salt (used garlic salt)
1/8 teaspoon pepper (used a bit more)
(I also added a dash of worcestershire sauce to the patties and a dash to the pan as they cooked)

Instructions
Place the raw hamburger in a bowl. Add the water, oatmeal, onion, garlic, salt and pepper. Use your hands to mix and mash the stuff all together until everything is blended evenly. Shape the mixture into patties with your hands. Make four large patties or 6 smaller ones. Preheat a skillet over medium-high heat for a couple of minutes. Place the patties onto the dry preheated skillet. Sear them on one side, cooking until they are a nice dark brown. Then flip them over with a pancake turner and turn down the heat to medium low. Cover the pan with a lid or a pizza pan. Allow the burgers to cook slowly for at least ten minutes. Turn them over again, recover and cook for five more minutes. They should be a lovely crusty brown on the outside, and gray colored inside, all the way through to the center. Drain the burgers on paper towels or brown paper bags for a moment or two before serving. These can be served on buns with all the normal burger fixing. However, they are equally good plain, as individual meat loaves.

Serves 4.

P.S. Hillbilly Housewife says to "Double this recipe to serve a hungry family of 6." She also recommends that it goes "Good with spinach, instant mashed potatoes and canned pineapple".


Technorati Tags: , , , , , , , , , , , , , , ,

Monday, December 18, 2006

Greek Lentil and Orzo Salad with Pita Crisps


I just made this because I didn't want a meaty meal and I was in a hurry (not to mention that lentils and orzo make a very affordable meal per portion). We're packing for our holiday vacation today and the house is a wreck. This hit the spot and the kids actually loved it - despite the fresh onion and red bell pepper in it. The sauce and feta on top is the trick. With the pita chips, the whole meal becomes a fun and festive Greek "dip"! Follow these easy steps to a QUICK meatless Greek meal.

Pita Crisps
2 pita pocket breads
nonstick cooking spray

Salad
1 tblsp olive oil
1 clove garlic, minced
3/4 cup dry lentils, rinsed
2 cups water
1/2 tsp salt
1/2 tsp garlic salt
1/8 tsp ground black pepper
6 oz. (3/4 cup) uncooked orzo or rosamarina (rice shaped pasta)
1/2 cup coarsely chopped green bell pepper
1/4 cup sliced kalamata or ripe black olives
1/4 cup coarsely chopped red onion
Dash each or to taste after done cooking (after draining): cumin, garlic salt, cayenne pepper, pepper, garlic powder, coriander, and parsley flakes.

Dressing and Topping
3/4 cup plain yogurt
1/2 cup shredded cucumber, well drained
1/2 tsp dried dill weed
dash salt and celery salt
1/2 cup crumbled feta cheese (I use sun-dried tomato & basil flavored feta)

Instructions
1. If you make your own pita crisps, you can use this step. If you have a bag of Stacey's Pita Chips, you can skip this step!... Heat oven to 375 degrees F. Cut each pita into 6 wedges. Separate each wedge into 2 layers. Arrange wedges, rough side up, in single layer on ungreased cookie sheet. Spray generously with nonstick cooking spray (I would use a brush with olive oil rather than spray). Bake at 375 F for 10 minutes or until crisp and lightly browned.

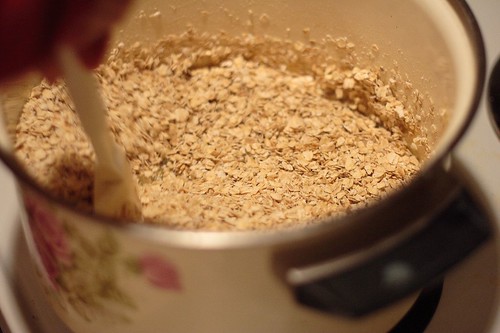
2. In large skillet, heat oil (I used a tad bit more - see step 6) over medium heat until hot. Add garlic and lentils; cook and stir 3 to 5 minutes or until lentils are golden brown. Add water, salt, garlic salt, cumin and pepper. Cover; cook 20-25 minutes or until lentils are tender but NOT mushy, stirring occasionally.

3. In medium bowl, combine yogurt, cucumber and dill. Mix well and set in refrigerator to chill and allow flavors to blend while you continue cooking.

4. Chop veggies (onions, bell pepper, olives) and set aside.

5. Cook orzo to desired doneness as directed on package (this only takes about 7 minutes and I would coat with a dab of butter or olive oil if you have to set them aside because the pasta 'grains' tend to stick). Don't overcook - no mushy orzo! Drain your pasta and set aside until lentils and veggies are ready.

6. Drain off any excess liquid from lentils after you have tasted a few and they are tender enough to eat, but not splitting and mushy. I had to boil mine for about 2 minutes after I let them simmer 20. I also used a tad bit extra of olive oil (maybe an extra 1/2 tblsp), and it came in handy when I mixed the rest of the ingredients together to use the oil left in the pan. Turn off the heat entirely and use the lentil pan to mix your ingredients. Touch up seasonings (see last item on ingredient list for salad).

7. Put serving portions on plates and line outside of plate with pita chips. Serve each portion with a generous spoonful of sauce and a tablespoon of crumbled (with fork) feta on top. Scoop up meal with pita chips or eat with fork. You could also pack a warm fresh pita with this mixture and eat it like a Greek burrito. YUMM!!!


Altered recipe from Pillsbury Classic Cookbooks - Apr. 1997 - #194 - "Pasta Beans & Rice Cookbook" (from grocery store check-out line).

Technorati Tags: , , , , , , , , , , , , ,

Thursday, January 19, 2006

Chinese Biscuits

I am not sure what you are thinking... since I wasn't sure what to think when my friend Gloria told me she was making these for our Christmas feast. We went to Gloria's house and she whisked these together while her husband deep fried the turkey. We all fell in love with these rich little dinner rolls. They truly are wonderful. You will just have to make them and find out for yourself! Don't blame me when you gain a pound or two, though. I never said they were good for you!

INGREDIENTS

2 cups all purpose

1 tablespoon baking powder

1 teaspoon salt

1 cup mayonnaise (not fat-free)

1 cup milk

4 tablespoon sugar


Mix Ingredients. Bake in greased muffin tin for 20 minutes at 400 degrees. Makes 1 dozen rolls.

Compliments of my church recipe book and my friend Gloria.

Technorati Tags: , , , , , , , , , , , , ,

Saturday, January 14, 2006

Speedy Chicken Nachos


This is what we had for lunch today... and let me just tell you that when the recipe calls for 3 minutes in the broiler, it really means 3 minutes! I tried to do 4 minutes, and it burned the tips of the outer edge of chips and set the smoke alarm off in our apartment! Oh, well... at least the meal was not ruined and the smoke alarm really works! My kids have since dubbed this tasty meal (which both of them had seconds of and raved about) "volcano nachos". I like the name, and have a feeling it will stick. I'll definitely be serving these more often, since they are a quick lunch for us busy homeschoolers.

Volcano Nachos

INGREDIENTS
  • 2 pouches (7oz each) Tyson Chicken Chuck Chicken Breast (I used a can of Hormel chicken breast)

  • 1 package taco seasoning (I used chicken taco seasoning by McCormick)

  • 1 bag (14 oz) tortilla chips (I used 1/2 a bag)

  • 1 bag (16 oz) shredded Mexican cheese blend (I used 1/2 a bag)

  • 1 can (10 oz) diced tomatoes and green chilies, well drained (I used 3/4 can of chopped green chilies because this is what I had left over from a previous dinner and the kids hate them... and I used fresh chopped and skinned tomatoes - 2 of them)

  • 1 can (4 oz) sliced black olives, drained (we didn't have these today, so we left them out)

INSTRUCTIONS

Using a fork, mix the chicken with half a package of taco seasoning in a bowl until chicken has shredded effect and is coated well with seasoning (we use a whole package because we like it spicy).

You might even add a tiny bit of mayo or cream of chicken soup if you wanted a few nachos to get a bit softer... but not much - and if you do that, I would put the cheese on first, and the meat on top, so that the meat would be crispy and dry at the top. Be creative and adapt this recipe to your own tastes. Everyone loves nachos!

Arrange chips on a foiled cookie sheet in a single layer and sprinkle the seasoned meat, chopped chilies and tomatoes (or drained can of Rotel), and cheese. Preheat oven to Broil. Broil nachos for 3 minutes.

It is best if you leave the light on and stay close by! Mine started to BURN at 3.5 minutes and had black edges in 4 minutes around the outer edge of the cookie sheet. If I had gone one minute longer, the entire dish would have been black, I'm sure!

Serve with your favorite dips or toppings (shredded lettuce, jalapenos, guacamole, sour cream....).

We love these with sour cream... but we didn't have any avocados today, and would have loved guacamole with them, too!


Recipe compliments of Tyson Foods.

Technorati Tags: , , , , , , , , , , , , , ,


Thursday, December 15, 2005

Lasagna #2

This recipe is out of my husband's family cookbook. I made it the other night, and it was really good. I hope you enjoy it, too. My husband calls this "reunion lasagna" because it makes a HUGE amount. It's a good dish to split into two smaller pans if you are cooking for a sick friend at church. You can make one meal and serve two families of 4.

INGREDIENTS:
1 pound of ground beef (recipe says up to 2 lbs., but I think that's overkill)
1 clove minced garlic
1 tablespoon parsley flakes
1 tablespoon basil
1 teaspoon salt
1 can crushed tomatoes (16 oz)
- or you can crush your own after peeling
2 cans tomato paste (I used one, and felt it was plenty)
10 oz lasagna noodles or 8 noodles (we use whole wheat)
24 oz large curd cottage cheese (or small curd - doesn't matter)
2 beaten eggs
1 teaspoon salt
1/2 teaspoon pepper
1/2 cup parmesan cheese
1 pound (16 oz) mozzarella cheese in thin slices
(deli cheese works great)

INSTRUCTIONS:
Brown meat and drain if greasy. Add next 6 ingredients. Simmer uncovered about an hour (great time to make a salad). Cook noodles in water. Drain noodles and swipe them each with a little butter so they won't stick together and tear. Leave them aside in a strainer until ready for them. Combine cottage cheese with next five ingredients.

Place half of noodles in a greased 13X9X2-inch dish (or throw-away foil lasagna pan). Spread half cottage cheese mixture on top of noodles. Lay 1/2 the mozzarella cheese slices on next. Pour 1/2 meat mixture on top of cheese slices. Repeat layers. Sprinkle parmesan cheese on top of last meat layer.

Bake at 375 for 30-40 minutes. You may freeze and use later. Bake longer if frozen first. Let stand 10 minutes before serving. Serves 8 people.

Tuesday, December 13, 2005

Chicken Breasts Diane

OK, I admit it. I got this recipe from one of those recipe card companies that send out free stuff in the mail, hoping you will take the bait and order the full set. I never did, but I have kept all those cards through the years, and occasionally, a few of the recipes have been really good. This was one of them. I call this "restaurant chicken", because it tastes like you really spent a lot of time on it. Even the kids liked it... even though they did ask - "what's that green stuff on top?" (the chives and parsley).

CHICKEN BREASTS DIANE

4 large boneless chicken breasts (or 6-8 tenders)
1/2 tsp salt
1/4 to 1/2 tsp black pepper
(fresh cracked is best)
2 tbsp olive or salad oil
2 tbsp butter
3 tbsp chopped fresh chives or green onions
juice of 1/2 lime or lemon (or about a tablespoon of bottled lemon/lime juice)
2 tbsp brandy or cognac (optional) - I like to use sherry also
3 tbsp chopped parsley
2 tsp Dijon-style mustard
1/4 cup chicken broth
(great way to use up leftover chicken broth)

Place chicken between sheets of waxed paper (or release type foil). Pound slightly with mallet or rolling pin. Sprinkle both sides with salt and pepper. Heat ONE TABLESPOON of oil and butter in large skillet. Cook chicken over high heat for 4 minutes on each side. Do not overcook or it will be dry. Transfer to warm serving platter. Add chives and green onion (I like to cut the chives and parsley with kitchen scissors right over the pan) to juices in chicken pan, whisking in the lime or lemon juice, brandy or cognac (or sherry), and mustard. Cook for 15 seconds (still on high) whisking constantly to prevent burning. Whisk in broth. Stir until sauce is smooth. Whisk in remaining oil and butter. Pour sauce over chicken. Serve immediately.

Wednesday, December 07, 2005

Sticky Chicky

This recipe comes from a recipe book that I got at a 75% off book store. I collect recipe books, and this one really caught my eye. Just the title alone is wonderful, "BEAT THAT!" If you don't have it, you should get it. From the forward, I learned that it is her SECOND cookbook, and there may even be more than two of them... and they are ALL on my Christmas list (Ahem! Hint, hint!). It is the only cookbook I have that actually has me laughing out loud as I read her notes on each recipe, and reads almost as good as any humor book out there. I'm going to give you an excerpt of her writing style on this recipe. Just promise me that when YOU buy her book, you buy it from MY Amazon link here: Beat That! Cookbook by Ann Hodgman

Enjoy!

**********************************************************************************

STICKY CHICKY (recipe from "Beat That!" by Ann Hodgman)

I'm getting bolder about giving people embarrassing recipes, especially if I'm sure that children will like them. As many of us knows, it's not easy to find a recipe that kids love and grownups like - and as my sister-in-law Anne said when she was little, "This is also vice versa." Sticky Chicky crosses the generations. You wouldn't serve it to company, but your children will love it, and you will find it perfectly acceptable, sort of like sweet-and-sour chicken without those embarrassing pineapple chunks. Also, it's easy and low in fat. Don't I sound like a woman's magazine?

The chicken needs to marinate for 24 hours or longer before it's cooked. Rice is mandatory with Sticky Chicky.

  • 1/2 cup vinegar (I use balsamic, but cider or distilled work too)
  • 1/2 cup soy sauce
  • 1/2 cup sugar
  • 2 garlic cloves
  • 1 tblsp grated fresh ginger
  • 3-4 pounds chicken pieces, preferably with skin removed, quartered (chicken breasts are my favorite here)

Combine the vinegar, soy, sugar, garlic and ginger in a shallow baking dish big enough to hold the chicken in a single layer. Stir marinade until the sugar dissolves. Put chicken into dish and turn each piece over a few times to coat well. Cover baking dish and chill 24 hours.

Next day, bring chicken to room temperature. Transfer chicken and marinade to large heavy skillet. Over medium heat, bring marinade to boil. Reduce heat to low, simmer chicken 15 minutes turning occasionally. Preheat oven to 200 degrees.

Check chicken for doneness (keep checking as you uncover skillet and cook chicken for 15 minutes longer or until meat is tender and juices run clear when you prick with fork). Put chicken on platter and cover with foil to keep warm in oven.

Turn heat up on skillet burner to cook sauce until syrupy and caramelized, stirring frequently. This takes up to 15 minutes. After ten minutes, turn heat back down to prevent sauce from suddenly overcooking. Return chicken to skillet and coat with sauce. Serve immediately.

Serves 4

This is by far not her funniest entry, but she is great, and I love her recipes that I have tried. She started cooking in her young years and by age 14, she won Seventeen magazine's Teen Gourmet of the Year. She is the author of 40 books for children, humor books for adults, and was the original food columnist for Spy magazine. And even more interesting, she has a Australian flying squirrel and a prairie dog as a pet (amoung the rest of her pet zoo). She dedicates her cook books to Keanu Reeves. Wonder why?

Tuesday, July 05, 2005

Quick and Easy Taco Pie

This is from my email folders of recipes I have saved over the years. I think I wrote it in 2002 or 2003. I haven't made this a while, but I need to! I originally made this because it sounded a lot like Grandma Betty's Mexican dip she always brings to parties.

  • 1 box Jiffy Corn Bread is what I used, but the recipe called for 1/3 cup bisquick

  • 1 cup cheddar or Mexican shredded cheese

  • 3 eggs 1/4 cup milk (I used goat milk, but any will do)

  • 1 small can green chillies - I only used 1/2 can

  • 1 small tomato - chopped shredded lettuce (I used romaine)

  • 1 lb ground beef

  • 1/2 cup chopped fresh or frozen onions

  • 1 pkg. taco seasoning (or to taste)

  • 1 small container of sour cream

  • Cilantro (optional - I added)

  • Black olives (slice them in circles)


Brown meat with onion. Preheat oven to 400. Grease or spray 10 inch pie plate (glass or corning is great). Mix corn bread/bisquick mix, eggs, and milk in bowl and set aside.

Meanwhile, chop or prepare lettuce, olives and cilantro. Set salad stuff on table in serving bowls.

Drain meat, pour in Taco seasoning and stir. Simmer another few minutes to mix flavor in. Remove meat and onion mixture from stove and pour into baking dish as bottom layer of casserole. Pour prepared batter over meat layer. Spread evenly. Bake 20-25 minutes.

Remove from oven and sprinkle tomatos and cheese on top. Cook for another 10 minutes (I just let it melt on top because the cornbread was browned already and cooked through). Test cornbread with toothpick to make sure it is cooked through. Remove from oven, cool slightly and serve with lettuce/cilantro, diced olives and sour cream.

Serves 4-5 people.

Serving suggestion: Great with salsa, chips, iced tea and sliced fresh or pickled jalapenos.

Wednesday, June 29, 2005

Enchilada Pie

This is surprisingly better tasting than it sounds. In fact, I would have NEVER made it had it not been for a moment of sheer foodlessness. We were eating out of cans and I just happened to have all of the ingredients. I share it with you folks who may want to whip up a REALLY QUICK recipe for a POTLUCK that will please a hungry crowd.

  • 1 lb. hamburger meat

  • 1/2 cup chopped onion - optional

  • 1 can cream of chicken soup

  • 1 can Mild HATCH Enchilada Sauce (I like Medium - a little spicy!)

  • 1 can chopped green chili peppers

  • 1/2 bag of PLAIN Doritos (or Tostitos/other brand, but I like the Doritos)

  • 2 cups grated cheddar cheese

  • handful of chopped olives - optional
  • Brown meat with onion until done. Mix soup, sauce and chili peppers and warm over heat in sauce pan. Add meat and stir together. Grease a casserole pan (the larger you have, the fewer layers you'll need) and layer ingredients (except HATCH sauce). I use a large rectangular pan and do one layer of chips on bottom, then the meat and soup mixture, and then one layer of chips on top. After your layers are complete, open can of HATCH and pour evenly over top layer of chips. Cover with cheese and sprinkle with olives. Heat in 375 degree oven until cheese is melted. I usually bake for 30 minutes until bubbling. Let cool and serve with salad and tea!

    Original recipe was given to me by Ettie M.