Showing posts with label Dessert. Show all posts

Tuesday, June 23, 2009

Kristen's Wedding Cake


What is it about wedding cakes that make them all have 'issues'? Mine nearly fell over at my reception. Seems Kristen (although her day seemed nearly perfect) had the same trouble with hers.

Looks pretty, right? Well I don't know if it was the heat or what... but it started to lean and slide.


Her wedding party had to do 'cake surgery'. They cut the top off and set it up beside the bottom on another tray. The cake in the background is a TIRE cake. That was the groom's cake. Both were good, but the chocolate and butter-cream and cream-cheese frosted wedding cake was the most moist I have ever eaten.

I had two slices. Don't tell Kristen.


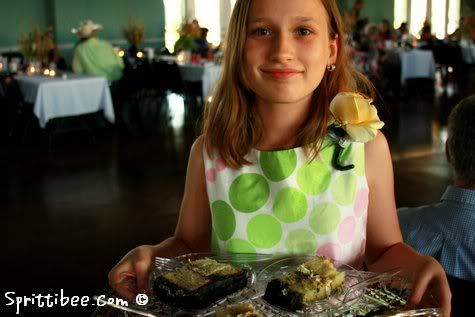
This is Morgan serving groom's cake.

I love the way those tires looked, but fondant icing is gross.

I'm happy for Kristen that the women who were hanging around waiting for some of that delicious cake caught it before it became a puddle on the dance floor!

Too bad you have to wait for a wedding to eat wedding cake!

Monday, April 20, 2009

Owl Baby Shower and Bee's Berry Punch


"Whoooo doesn't love a baby?" That was my baby shower theme. These are the photos from yesterday's festivities - and YES, I got my cupcake... but was not impressed with the fact that it didn't start my labor like I had hoped. See that little finger indentation on the icing? That's my friend Ammie's little girl's mark. Party tip: make sure you watch the little ones if the cake is out on the counter!


Morgan was wearing her 'inspiration' shirt - complete with the little bird and branch that is very similar to what we'll be painting on her wall. I tried in the last two weeks to get the energy up to go paint the murals in the baby room, but it wasn't meant to be. There will be plenty of time for that later, I hope.


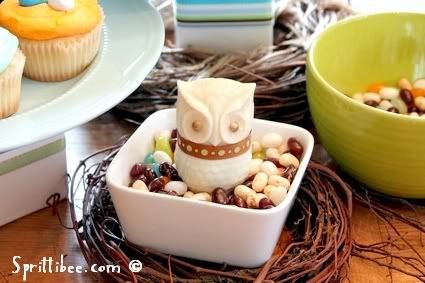
Decorating with owls was quite fun. The theme was expanded on with birds nests, ribbons and eggs. I used some older owls I have collected over the years - including this Avon owl that I've had since I was a wee little girl. We gave him a pretty new collar and he stood watch over the perfectly colored jelly bellies.


By far the biggest hit was the cake my friend Ammie ordered. We got the cupcake idea off of Flickr and altered it to be a buttercream icing creation. My downfall is buttercream icing. It wasn't as pretty as fondant, but it was EXTRA yummy.


We also had chili dip, artichoke dip, chips, crackers, cheeses, fruit, candy, and an incredible punch to go with our cupcakes and cake. The punch was my own creation. Here's the recipe:

BEE'S BERRY PUNCH

Adjust the amounts of each ingredient to fit your taste and the size of your punch bowl.

chilled ginger ale
frozen piña colada mix (run hot water over it to soften before putting in the punch)
bag of frozen mixed berries
raspberry sherbet
chilled berry/cranberry juice
crushed ice

Everyone enjoyed the punch. We got a lot of compliments on it. I wanted more myself, but by the time people started leaving and I had a chance to make it back over to the punch bowl, there wasn't any left.


Aside the punch bowl was the "diaper cake". Another baby-shower Flickr idea. I told you that Flickr was the bomb. So many creative people out there! We used wadded up grocery sacks as the center of each layer and rolled diapers to go around the edge before tying them off. It just so happened that I had a package with light green and white - which went perfect for our nursery-color schemed party. The tip top has a nesting stuffed owl. I had planned on tying off some pacifiers with ribbon and letting them dangle from the nest - but time got away from me and I forgot to add them.


Ammie found this cute white cupcake stand at Target. I glued a tiny orange bow at the top. We added ribbon to all the white table-top accessories. I thought her flowers she got half price at Lowe's were a nice touch to the table-top, too. You don't have to break the bank to have a nice looking party spread (well, if you know how to decorate cakes yourself, that is!).


Interestingly, I found out that Ammie had planned to do her two year old daughter's room in an owl theme, too. Not quite the same colors (she was adding in pinks), but her Pottery Barn owls were a cute touch as party decorations. Great minds think alike. I was glad little A let us borrow her owls (even if she did pull them down a few times to tell us which one was her favorite).


This was our artistic contribution to the party. I made an owl out of card-stock, scrapbook paper, and ribbon - colored with crayons and markers - to hang on the wall over a row of chairs. The little ones enjoyed coloring a few of them that I drew on paper, too. It kept the tiny hands busy while the grown-ups scurried to prepare for the guests.

During the party we played a few games - the guys got to identify the chocolate 'poo' in newborn diapers and the girls had a relay race to see who could dress and diaper a doll. More of the younger girls played than the grown-ups during the women's race. The doll owner finally got tired of sharing and took our prop, so we ended that contest early. We gave away two Starbucks gift cards to the winners of each.

All in all, the party was a lot of fun. I had to enlist my husband at the end to help open gifts because I started having some contractions and was unable to bend forward to look in the bags. I feel like I swallowed an exercise ball, I'm soooo big.

It's nearly 11pm on Sunday night and I'm having contractions as I write. All our bags are packed and now that we've had the shower, the carseat is ready and installed in our vehicle. We're as ready as we can be for the little 'hoot' to get here. If he comes tonight, we'll know for sure he's a night-owl.

I'll try to 'tweet' when I can if we head to the hospital. Until then, I may be hard to find online.


Subscribe to Sprittibee by Email

Buzz Words: , , , , , , , , , , , ,

Wednesday, April 15, 2009

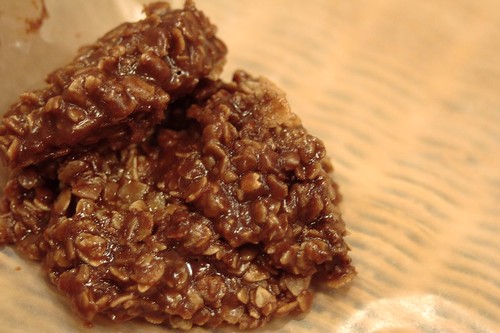
No Bake Cookies: Your Butt Will Hate You

IMG_4550

The other day I got a craving for a little gem of a cookie that I hadn't made for years. I see them at The Market where I work and I endure a fierce battle in my mind every time a customer comes through with a pack of them. Because I've lost 15+ pounds in the last few months and those cookies are The Devil.

But then I got sick and had my girly time (sorry boy readers) at the same time and well, my defenses were down. I made the cookies. In fact, I made them twice. Only the second time, I did remember to take pictures so the 2% of you who have never made these can see how it's done.

IMG_4525

The beauty/evil of these cookies is that they are super quick: to make and to eat mass quantities. And most of us have the stuff in our cupboards already. DRAT! It's too easy!! You can find the recipe I used here. But I have to say I was bummed because I used to have one from my grandmother for these and it's now in the same wormhole as a couple remotes I lost and one of my favorite striped socks from last winter.

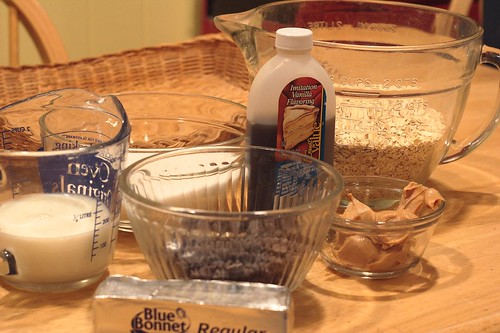
Here you can see you'll need milk, butter/margarine, peanut butter, chocolate chips, quick oats, vanilla, and SUGAR.

IMG_4528

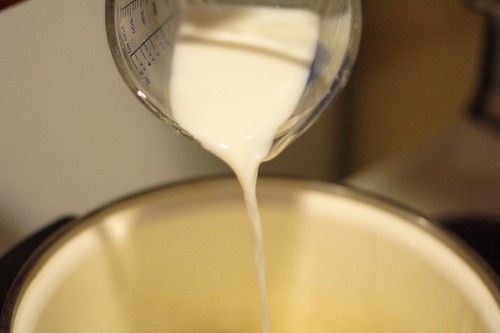
I do this the lazy way. I use one big pot and mix it all in there. I hate washing dishes,so it's not likely I would use another bowl unless someone was holding a knife to my throat. Anyway, throw the stick of butter in there, along with the milk...

IMG_4529

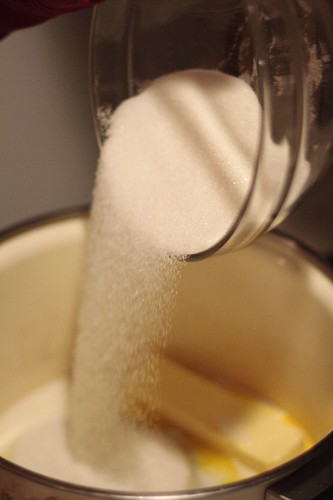
...and the massive amount of sugar.

IMG_4534

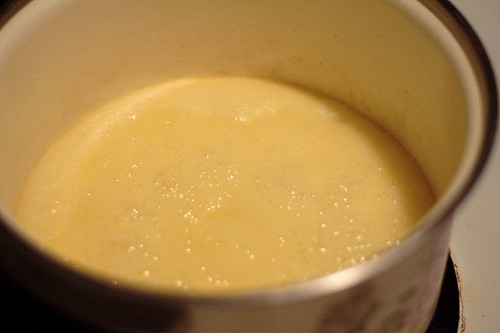
Then stir it a little and bring it to a rolling boil. That means boil the heck out of it. This is VERY important: once it really starts boiling hard, set your timer for one minute. You absolutely MUST boil it hard for one minute. No less. Or else they won't set until the next day and everyone will be eating goopy cookies from a plate with a fork. Not that I would know anything about that.

IMG_4536

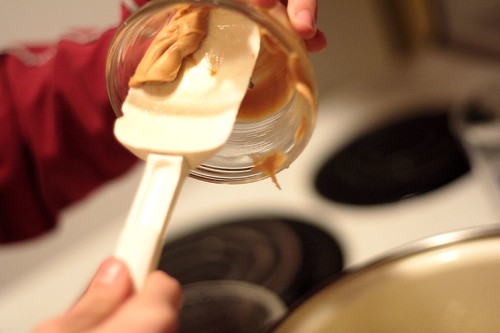
After a full minute has passed, quickly add the other stuff in. The recipe I used says peanut butter is optional. They blaspheme. Peanut butter is NEVER optional. I spit on you Optional Peanut Butter Fools! Unless you are someone who will suffocate from peanut allergies, then I guess that would be cool to leave it out. We don't want any of that going on.

IMG_4539

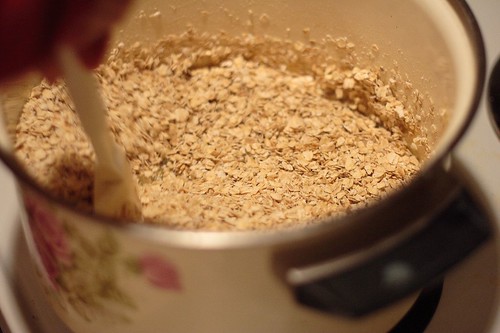
Add the oats. Which are the only healthy thing going for this cookie. It's because of the oats that I am duped into eating mass quantities every time I make them.

IMG_4541

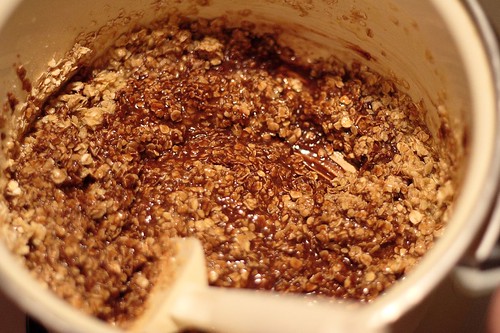
You'll want to finish stirring the rest of the stuff in there quickly because if you boiled properly, this stuff will already begin to harden a bit. So don't mess around. No texting or twittering or Facebooking or plucking chin hairs in between the steps.

IMG_4544

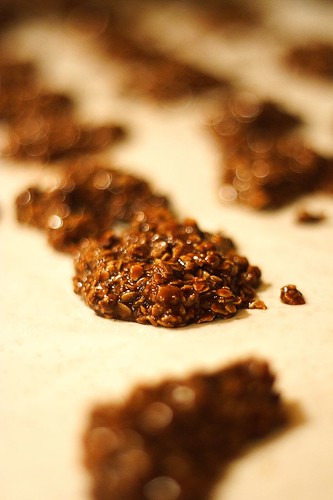
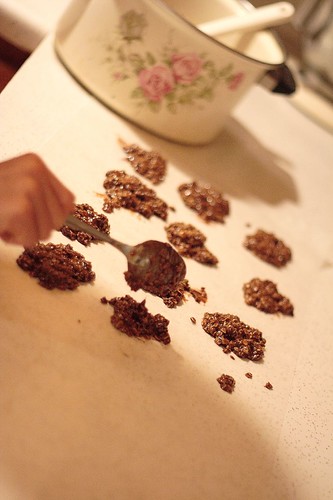
Get some wax paper and plop some globs onto it. Don't make them too big or they'll set slower. Then you have to wait to eat them. That stinks.

IMG_4551

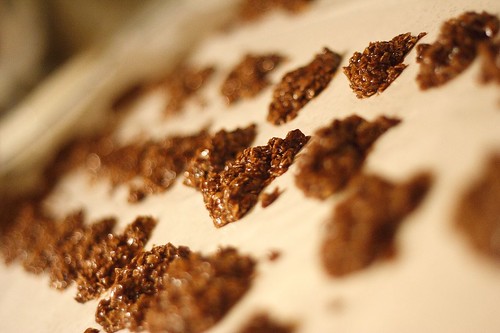
I've had varied results with the setting time. Sometimes they set within 15 minutes. Sometimes they don't set until the next day. They say that has to do with the boiling thing. I say it has to do with the economy. Why not? Everyone blames everything else on that.

IMG_4555

One should really work out after eating these. I'm just saying. But I've been sick, so I haven't worked out. And I ate a lot of them. I have a feeling you will too. They were totally worth it.

Love in Him,

Friday, January 23, 2009

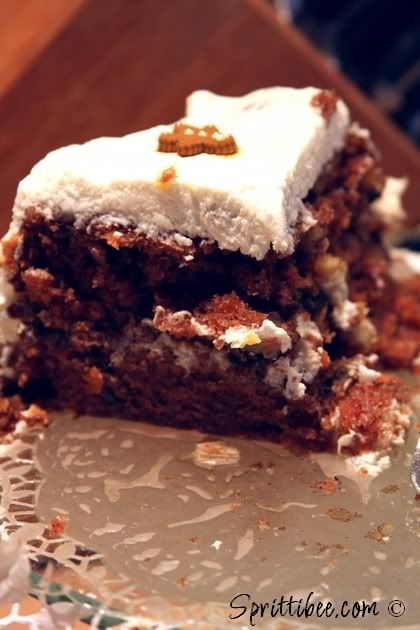
C is for Carrot Cake


This cake needs no introduction. You may require an armed guard to prevent others from eating it before you can get a slice, though. My daughter made it on her birthday. She was not quite yet 10. The recipe is so fool proof that even an elementary school kid can make it and it comes out delicious.

As a tip, I would suggest baking, cooling, icing, and then refrigerating so that the flavors can meld and the icing can solidify a bit. The icing is so creamy and dreamy. It isn't your typical buttercream (believe me, I don't have anything against buttercream). It isn't whipped topping from the grocery store, either. It is REAL cream - beat by hand. You just have to try it.

It's like cake on crack. Not to mention there are lots of veggies in there. So have an extra slice - it's kind of healthy.

- - - - - - - - - - - - - - - - - - - -

From Aunt Mary:

Preheat oven to 350 degrees. Bake time approximately 30 minutes (do the toothpick test). Spray two round baking pans with butter flavored Pam. Line the bottoms with rounds of wax paper.

CAKE:

2 cups of Sugar
2 Cups of Flour
4 Eggs
2 Tsps of Cinnamon
1 ½ Cups Canola Oil
2 Tsps of Vanilla
2 Cups of Carrots
2 Tsps of Baking Soda
1 Small pkg of Walnut pcs.
1 Tsp of Salt

Sift dry ingredients and set aside. Cream eggs & sugar. Add Oil and cream thoroughly. Add dry ingredients & mix well. Add carrots. Mix. Add Walnuts. Bake approximately 30 minutes, or until the toothpick comes out of the center damp but not with batter on it.

ICING:

1 8 oz. pkg of Cream Cheese at room temperature
½ pkg of Powdered Sugar
1 small pkg of walnut pieces
1 small pkg of Heavy Whipping Cream
1 Tsp Vanilla

Whip cream until stiff peaks can be made. Set aside. Smooth cream cheese in the mixer. Add powdered sugar and mix until creamy. Add Vanilla and mix. Fold in the whipped cream. Stir in walnuts.

Once the cake has cooled on a cooling rack, remove one cake onto a cake plate. Ice the top with about ¾ inch layer of icing. Add the other layer. Using a flat spatula, ice the top of the cake and smooth the icing down onto the sides until completely covered.

It is best to keep the cake refrigerated once it is iced, due to the whipping cream ingredient.


There you have it folks. Even a 10 year old can make it. And it will make you not want to share any more. So be sure you make an extra cake if you are the greedy type.


Subscribe to Gathering Manna by Email

Technorati Tags: , , , , , , , , , ,

Tuesday, January 06, 2009

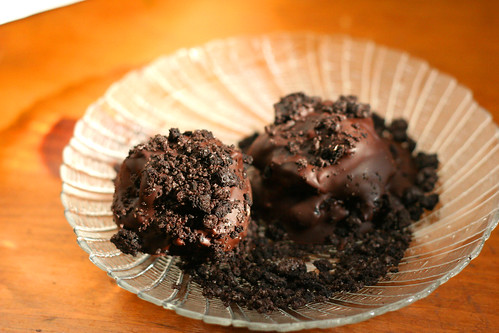
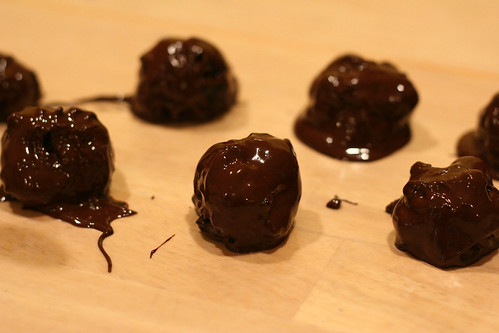
Who Said Truffles Had To Be Round?

2008 12 19 031

Twas the night before Christmas (or the week before in my case),
when a fellow cashier and I were standing around at our registers wondering where all the yuletide shoppers were. In that fateful moment she whipped out some of those free recipe cards you find littering the floor of some major retailers around the holidays. You know, the kind the little Sample Ladies hand out and somehow the little naughty children get a hold of them and throw them all over the floor for friendly cashiers like me to pick up?

Yeah, those ones. So she handed me one and I skimmed it at lightning fast speed because I'm not usually into these froo froo holiday recipes and whammo!~I saw one that only took three ingredients. Three! How simple can that be, I thought.

So as I made my maiden voyage into the land of Truffles, I took some photos, because I thought maybe you all needed a laugh.

Join me for a journey of unexpected surprises.

And go here for the actual recipe that you can print out for your own maiden voyage of Truffledom.


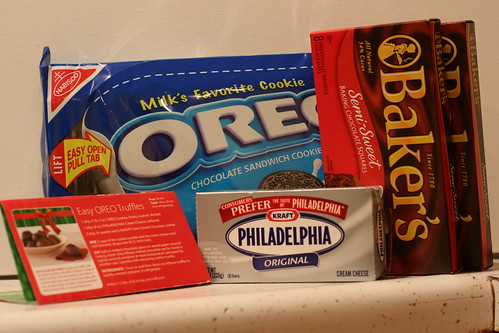
2008 12 19 006
There you have it, the 3 Musketeers, if you will. A deadly combination if I ever saw one. But I will warn you: a simple ingredient list doesn't always mean a simple recipe. You'll notice on that innocent red card that this recipe is actually called "Easy OREO Truffles." Ha. That's a good one. But don't be disheartened yet.

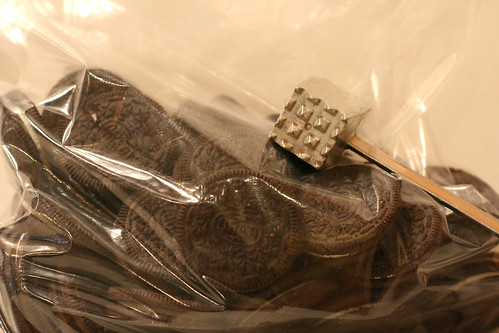
Step 1: crush the oreos. Learn from my mistakes young grasshoppers.
2008 12 19 008
Crushing oreos in a plastic baggie with a sharp meat tenderizer isn't the best idea I've ever had. I got three whacks in before I notice the gaping holes in the bag. Duh.

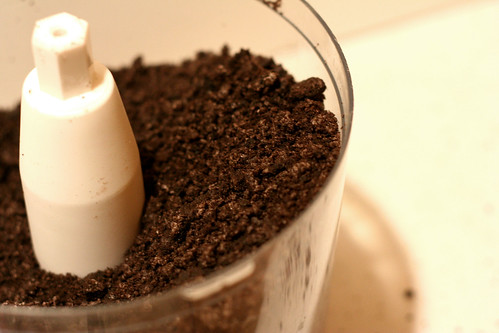
So I pushed my laziness aside and got out the Big Daddy of crushing.
2008 12 19 013
It made short work of making these beauties into crumbs.


2008 12 19 014
That's the stuff that dreams are made of.


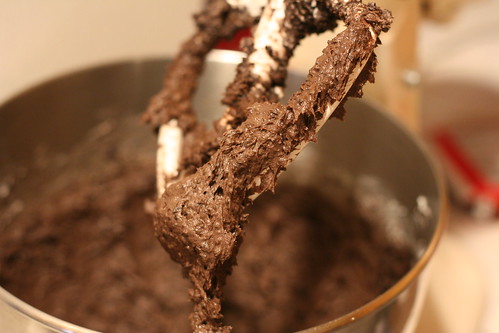
Step 2: Add the cream cheese to the crumbs and try not to eat too much of this.
2008 12 19 019

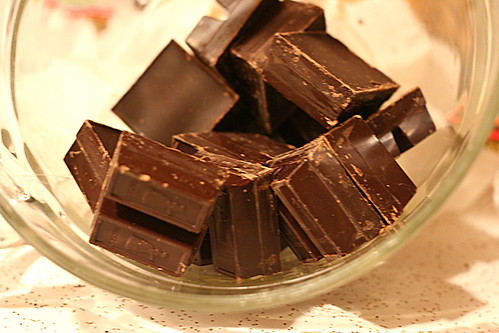
Step 3: Break up BOTH boxes of chocolate into squares and melt it.
2008 12 19 021

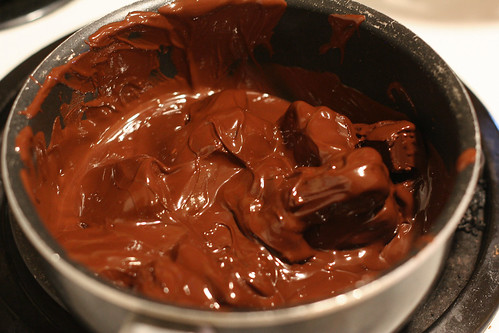
Here's where you have a choice. Microwave or stovetop. When it comes to melting chocolate, I always choose stovetop because it is inevitable that when I put chocolate to melt in the microwave, it will burn and smell very badly for the remainder of the day. Maybe you don't have this problem. If not, nuke that chocolate to your heart's content.

2008 12 19 022
Melt the chocolate, and stir it almost constantly. You don't want any of that chocolate goodness to burn to the bottom of the pan. And you want it consistently hot because the purpose of this is for dipping. Which it turns out, I am not an expert at.
Step 4: Make 1 inch balls with the cream cheese/crumb mixture.
2008 12 19 023
If I ever make this again, I would chill this mixture for about an hour before I formed it into balls for dipping. This was messy and uncooperative. It was at this point that I started to doubt any culinary abilities I've acquired.

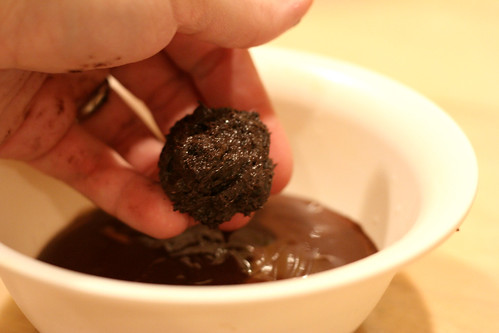
Step 5: Put some melted chocolate in a bowl and get two forks.
2008 12 19 024
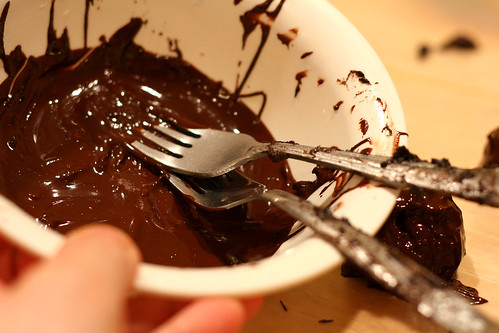
This is how you will dip the balls. Work very quickly because the chocolate will be cooling at breakneck speeds. And the two forks are not for practicing any kind of ninja moves. You'll need both to perform a move much like Mr. Miyagi to roll your cream cheese balls around in there.
Step 6: Don't worry if your truffles don't look nice. Just get them on the wax paper.
2008 12 19 025

And here's a tip: put a cookie sheet under that wax paper. You'll need it later. I learned that the hard way.

Step 7: Sprinkle the remaining crumbs onto the truffles and put in the fridge for an hour or so.
2008 12 19 027

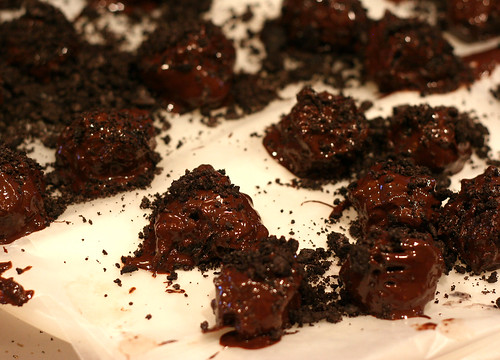
And here's the part that makes it all worth it.

2008 12 19 031

These tasted so darn good, I momentarily forgot all about the holes in the plastic ziploc, the gooey hands covered in cream cheese/crumb mixture that made it near impossible to take pictures. I almsot forgot the Mr. Miyagi type moves it took to roll them in the melted chocolate.

Because round or not, these truffles are fantastico to eat.

Tuesday, October 14, 2008

Sopapilla Cheesecake

We really like this recipe... but let me warn you in advance, it fits NOWHERE on any diet plan. You can't beat how easy it is, though. It is a great dessert for a church function and goes perfect with a Mexican meal.

I couldn't tell you where the recipe originated. I have two friends that both gave me the same one, though - so I would say that there are plenty of people passing it around!

Sopapilla Cheesecake

Ingredients:
3 packages (8 oz) Cream Cheese – softened
2 packages Crescent Rolls (8 count per can)
1 ½ cups Granulated Sugar
1 tsp. Vanilla 1 stick Butter – melted

Topping:
½ Cup Granulated Sugar
2 tsp. Cinnamon

Instructions:

Preheat oven to 350 degrees. Grease 13x9 baking pan (I used PAM).

Whip Cream Cheese, Sugar and Vanilla in large bowl. Unroll 1 package Crescent Rolls and place in the bottom of the baking pan.

Spread Cream Cheese mixture over Crescent Rolls. Top with 2nd package Crescent Rolls.

Pour Melted Butter over top. Mix Topping ingredients together and sprinkle over the top.

Bake at 350 degrees for 30 minutes. Refrigerate before serving.


Subscribe to Gathering Manna by Email

Technorati Tags: , , , , , , , , , ,

Tuesday, July 01, 2008

Morgan's First Cake


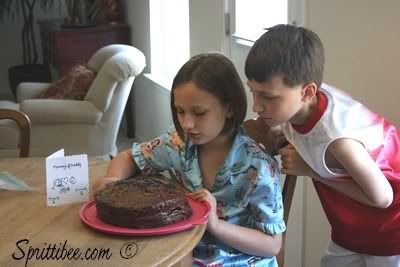
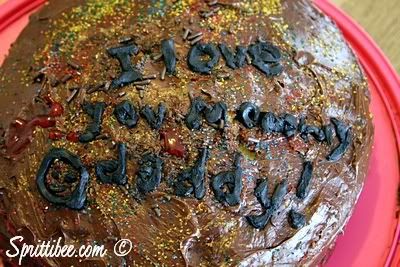
She's nine years old and has helped in the kitchen for a long time now... but this time she wanted to do it HERSELF. She baked a yellow cake with chocolate icing and broke out the entire army of sprinkles and icing tubes for a topping. After all, a cake isn't a cake without sprinkles if you are a kid, right? The only thing I did was help her take the pans OUT of the oven and show her how to ice the cake briefly before she took over the spatula. She really did it HERSELF.


I think she did a fine job for her first time baking alone. We have yet to dig in to the cake (so I don't know what it tastes like), but unless it is horrible and I have to come back in to edit this post, I'll let you believe it tastes as good as it looks.


My favorite part of this experience was:

1. I didn't have to bake the cake myself. As my cousin said to me today, she can't wait until she can tell her daughter, "Cook for me, my minion!" Today the cake, tomorrow DINNER! I'm seeing many a night off from dinner duty in the future and it looks extra real good, baby.

2. I'm thrilled that the kids are wanting to cook (even if Kaden's only contribution to this particular project was sprinkles) - maybe they won't be as useless as I was when I got married and only knew how to boil water, pour cereal, make cheese-toast and cook hamburger helper. Already I think both of them have far surpassed my skills at 20. In fact, on occasion they will take turns making me breakfast - cheese toast and chocolate milk. That's multi-tasking, folks. When you are under 11 you should get allowance for stuff like that.

3. She decorated the cake for ME and her dad. Always a brown-nosing plus... especially when done on any form of chocolate.

4. She made me a card to go with it. And everyone knows I'm a greeting card junkie. Home made is even better. Maybe she needs an Etsy shoppe?

I'm sure she'll post about her cake on her blog, too. But not today. Because I'm all blogged out. Four blog posts in one day is enough to make anyone NEED cake. In case you wanted to check out those other blog posts, you can do so at these sites:


Sprittibee
Heart of the Matter (today's article won't be up until the 8th)
and
Homeschool Blog Awards

Oh, and I'll be hosting the Homesteading Carnival soon... next Monday, I think. I'm anxious to get my garden update added to that. The watermelon is going crazy! However, this Texas heat is really hard on the plants without rainy days in the mix. We had one day of rain recently, but 95% of the state is in a drought. Pray for us Texans to get rain if you think of it.


See ya, round.


Subscribe to Gathering Manna by Email

Technorati Tags: , , , , , , , , , ,

Thursday, June 19, 2008

Berries and Cream

With summer here, I thought maybe I'd give you a quick, healthy, usable recipe. Well, healthy if you use the honey - not the sugar! I know I completely neglect this site, but I'm going to TRY and do BETTER. I have about four recipes that I am just itching to get in here... but haven't had time to breathe lately. Yesterday Kaden had a root canal on his #9 front tooth and we've had house guests and things to do... I assure you that Kaden's root canal had nothing to do with the fact that it was a "sweet tooth". He has cement teeth like me... but apparently they chip on playground equipment while playing dodge ball. I never really understood the concept behind dodge ball, anyway... and it certainly isn't worth thousands of dollars worth of dentistry, eh? Just to get hit by a ball in the head? Children are crazy.

OK... The recipe!

Something sweet and simple for summer... something we discovered by chance a few weeks ago after a loving family member brought us a bag full of blackberries...

Berries and Cream

Ingredients:
berries (any kind - blackberries are what we used)
2 % milk (or whole milk)
Sugar (to taste)
Honey or Agave Nectar (optional or substitute)
Vanilla (just a bit)

Tools:
French Press
Spoon and bowl for eating

INSTRUCTIONS:
Here's the trick... take your cold milk and put it in the French Press. Pump the press until the milk is foaming and creamy. Pour it into a bowl and stir in the sugar, vanilla and honey if you want it. Taste as you go to see if you like the flavor. Start with small amounts until you get the milk to taste the way you want it. Blend in the berries, mix and eat!

I was so impressed with the way the French Press creams the milk! My husband is really excited that his French Press has found a purpose. He bought it and hated the way it made coffee, but now he uses it almost daily to foam milk for his morning espresso that he makes on the stove top.

Try it and let me know what you think!

Happy summer eating!


Subscribe to Gathering Manna by Email

Technorati Tags: , , , , , , , ,

Saturday, May 03, 2008

Kentucky Hot Brown and Carrot Cake


Both of those look great, don't they? I posted about them on my other blog. Sorry for neglecting you in here. I just haven't had the time to update it lately. I will come back in with some recipes soon. I promise.

Do any of you have a good recipe to share for a Kentucky Hot Brown? I'd love one.


Subscribe to Gathering Manna by Email

Technorati Tags: , , , , , , , ,

Tuesday, September 04, 2007

Homemade Chantico (Old Fashioned Hot Chocolate)

It is almost a crime to post this old fashioned hot chocolate recipe without a photo. Better yet, I wish I could just pass you a tiny cup of it through the screen. My husband makes this for me when he wants to score brownie points. It is so rich and wonderful that it MUST be drank in VERY small quantity or you WILL get SICK. Remember the Chantico from Starbucks? For some reason it didn't go over well and they deleted it from the menu. Probably because of the large glass they sold it in... and most likely all of the tummy aches that followed if someone tried to finish off such a large amount in one sitting! I would serve this in tiny espresso cups. If you are brave (or crazy), go back for a second helping.

Homemade Chantico or Old Fashion Hot Chocolate

3/4 cup warm water
3 heaping tbsp Frys Coco Powder
8 heaping tbsp sugar (if you want it to taste like Starbucks, use LESS sugar)
2 tsp cornstarch + (1 tbsp water)
1 pinch salt
2 tsp butter (optional)
pinch of cayenne pepper (optional, but VERY good)

Mix well and serve hot.


Subscribe to Gathering Manna by Email

Technorati Tags: , , , , , , , , , , , ,

Sunday, June 10, 2007

Honey Cookies (Better than Snickerdoodles!)

These cookies are better than snickerdoodles. If you don't know what a snickerdoodle is, you haven't lived. OH. YES. You don't believe me, do you? Honest to goodness, these cookies are THE BOMB. Like a golden treasure in a hidden cave, my children and I discovered the recipe for these wonderful cookies in a children's book. I wish I could give the author a great-big, Texas-sized hug... because these little sweeties are now my favorite cookies (well, at least they are right up there with Mexican Wedding Cookies for sure). Move over Nestle's Toll-House Chocolate Chips and Grandma's Oatmeal Doodles. There's a new bad-boy in town.

I have written down my "healthier" version of the recipe below... but if you want to know the author's original one, you'll just have to read the book. Believe me - it is worth having on your children's book shelf. It is a very, very cute book indeed. The title? A Cow, a Bee, a Cookie and Me

INGREDIENTS
1/2 cup real butter (or 2 sticks)

2/3 cup granulated turbinado sugar (you can buy it at Wal-Mart if your grocery store doesn't carry it)

2 tablespoons raw honey (plus a little extra if you like)

1 fresh egg yolk

1 level teaspoon cinnamon

1 3/4 cups half wheat, half white (unbleached and unbromated flour)

2 3/4 teaspoons baking powder

1 teaspoon of salt

Cinnamon and Sugar mixture for coating

INSTRUCTIONS
Preheat oven to 350 degrees F.

In a large bowl, cream together the butter and sugar. Beat in honey and egg yolk.

In another bowl, sift together the cinnamon, salt, baking powder and flour (you can just use a fork if you are in a hurry).

Pour flour mixture into creamed mixture and blend into a soft dough. The dough will be pasty and not loose. Don't be afraid if it seems really thick - it isn't a runny dough. Once you have it completely mixed, it will look a lot better. Don't add any more egg or butter - even if you are tempted.

Shape dough into teaspoon sized balls (roll them in your hands) and roll them in in a plate of cinnamon and sugar mixture before placing them (spread apart nicely) on a foiled cookie sheet. Mixture should make about 30-40 smallish cookies if you can prevent yourself from devouring the dough (good luck!).

Bake for 12-15 minutes depending on your oven and altitude. Take them out when you first see a hint of browning because they are better when they are soft (but not gooey). These cookies will get hard quickly, so if you like them softer, be sure to NOT bake them until browned and keep them in an air-tight container after cooling (that is, of course, IF there are any left over to store). Around my house, we usually eat them as quick as they come out of the oven.

You are going to thank me for this recipe. I promise.


Friday, November 24, 2006

Pumpkin Pie Cheesecake

Here's another grocery store cookbook favorite at holiday times! This one is nice for your holiday family and friends who are unable to eat nuts. My husband made this yesterday and with all of the other deserts present, it still got eaten up almost entirely. Be sure to serve it with a dollop of cool whip or whip cream and even the tiniest sprinkle of cinnamon or nutmeg on top would be nice. Oh, and don't over-whip the white cream cheese part or the pumpkin will tend to sink into it instead of forming its own layer on top. Enjoy!

Philly 3-Step Double Layer Pumpkin Cheese Cake
by Philadelphia Cream Cheese "Make Every Day Special" Recipe Book No.97
Vol. 5 ~ Oct. 15, 1996

Prep Time: 10 min.
Bake Time: 40 min.

Ingredients:
2 pkgs (8 oz. each) Philadelphia Cream Cheese, softened
1/2 cup sugar
1/2 tsp. vanilla
2 eggs
1/2 cup canned pumpkin
1/2 tsp. ground cinnamon
Dash each of ground cloves and nutmeg
1 Keebler Ready Graham Cracker Pie Crust (6 or 9 in) ~ Kev prefers 9

Instructions:
1. Mix cream cheese, sugar, and vanilla with electric mixer on medium until well blended. Add eggs; mix until blended. In separate bowl, mix pumpkin and spices. Stir ONE CUP of the cream cheese batter into the pumpkin batter and blend well.

2. Pour remaining cream cheese batter into crust and flatten across pie to edges. Top with pumpkin batter forming two distinct layers in pie crust.

3. Bake at 350 degrees f. for 40 minutes or until center is almost set. Cool. Refrigerate 3 hours or overnight. Garnish with whip cream/cool whip and a sprinkle of spice when serving (optional).


Technorati Tags: , , , , , , , , , , , , , ,

Wednesday, November 22, 2006

Thanksgiving Meal Menu with Recipes

This is last year's Thanksgiving Menu that I cooked for our family of four. For the first time in my life, I had to make the entire meal myself - no potluck family get-together! It was a lot of work, but worth every bite. These recipes were gathered from various places. Credit is given where it is due.

I thought I would share these recipes in time for Thanksgiving (well, almost in time). I'll be making the sweet potato casserole this year (tomorrow night I will mix it up and I'll bake it Thanksgiving morning before we leave for lunch with friends). I'm excited that I don't have to do the rest of the work this year. I have a few parties to cook for other days before the holidays, so I am glad for a break on the big meals. We will be in Texas with family at Christmas time, Lord willing (and I'll have to refrain from stuffing myself until I pop). We come from a long line of Texas master-chefs on all FOUR sides of our family. This year we're making pumpkin pie cheesecake for a friend who can't eat nuts (even though our favorite is actually pecan pie). I'll share that recipe some time soon! If you can't live without it before Thanksgiving, email me.

I hope you have a wonderful holiday. What a blessing that we have freedom, food, health, family and friends. Let us all give thanks to the One who makes that possible. By the way, to all of the Native Americans out there... thank you for the wonderful foods that you brought to our tables (we would not have had so many wonderful dishes had it not been for your help), and please accept my humble apologies for any ill-treatment from the pioneers who came before me. I am a small bit Cherokee myself... and I often grieve over the sadness that this holiday may impart for some Native Americans. I hope we can all give thanks together - despite the evils of the past. May God forgive us and heal us all.


___________________________________


Thanksgiving 2005 Recipes

Better Homes and Gardens: All-Time Favorites (Grocery Store Softback)
Page 17
Roasted Chicken (1930) - (*also see Seasoning the Turkey recipe below)

Prep: 10 Min.
Roast: 1.25 Hours


1 3.5 to 4 lb. Whole Chicken
Salt (optional)
1 small onion, quartered
2 stalks celery, cut up
Cooking oil
Dried Thyme or oregano, crushed (optional)

Rinse chicken; pat dry with paper towels. If desired, rub inside of body cavity with salt. Place onions and celery in body cavity. Skewer neck skin to back; tie legs to tail. Twist wing tips under back. Place chicken, breast side up, on a rack in a shallow roasting pan; brush with cooking oil and, if desired, sprinkle with herb.

If desired, insert a meat thermometer into center of an inside thigh muscle. Do not allow thermometer to touch bone. Roast, uncovered, in a 375 degree over for 1.25 to 1.75 hours or until drumsticks move easily in sockets, chicken is no longer pink, and meat thermometer registers 180 degrees to 185 degrees. Remove chicken from oven; cover and let stand ten minutes before carving. Makes 6-8 servings.


Better Homes and Gardens: All-Time Favorites (Grocery Store Softback)
Page 60
Caramel Pecan Pumpkin Pie (1939)

Prep: 15 Min.
Bake: 45 Min.

1 recipe Pastry for Single-Crust Pie (p 55)
2 eggs slightly beaten
1 15-oz. can pumpkin
¼ cup half-and-half or milk
¾ cup granulated sugar
1 tbsp all-purpose flour
1 tsp finely shredded lemon peel
½ tsp vanilla
½ tsp salt
¼ tsp ground cinnamon
¼ tsp ground nutmeg
1/8 tsp ground allspice
½ cup packed brown sugar
½ cup chopped pecans
2 tbsp butter, softened

Prepare pastry and line pie plate as directed. In a large bowl, stir together eggs, pumpkin and half-and-half. Stir together granulated sugar, flour, lemon peel, vanilla, salt, cinnamon, nutmeg, and allspice. Pour pumpkin mixture into pastry-lined pie plate. To prevent overbrowning, cover the edge of the pie with foil. Bake in a 375 degree oven for 25 minutes.
Meanwhile, in a medium bowl stir together the brown sugar, pecans and butter until combined. Remove foil. Sprinkle brown sugar mixture over the top of pie. Bake for 20 minutes more or until a knife inserted near the center comes out clean and topping is golden and bubbly. Cool on a wire rack. Cover and refrigerate within 2 hours. Makes 8 servings.


Better Homes and Gardens: All-Time Favorites (Grocery Store Softback)
Page 55
Pastry for Single-Crust Pie (1930)

Prep: 10 Min.

1.25 cups all-purpose flour
¼ tsp salt
1/3 cup shortening
4 to 5 tbsp cold water

Stir together flour and salt. Using a pastry blender, cut in shortening until pieces are pea-size.
Sprinkle 1 tblsp of the water over part of the mixture; gently toss with fork. Push moistened dough to side of bowl. Repeat, using 1 tbsp water at a time, until all the dough is moistened. Form dough into a ball. On lightly floured surface, flatten dough. Roll from center to edge into a circle about 12 inches in diameter.

To transfer pastry, wrap it around rolling pin; unroll into a 9-inch pie plate. Ease pastry into pie plate, being careful not to stretch pastry.

Trim pastry to ½ inch beyond edge of pie plate. Fold under extra pastry. Crimp edge as desired. Do not prick pastry. Bake as directed in individual recipes. Makes 8 servings.


Husband’s Family’s Cookbook
Page 139
Broccoli and Rice Casserole
Submitted by Husband’s Mom

2 Cups Cooked Rice
1 stick Margarine or Butter, melted or softened
1 jar (8 oz.) Cheese Whiz
1 med. Onion, chopped
1 pkg. Chopped Broccoli
1 can Mushroom Soup

Combine all ingredients, put in casserole dish and bake at 350 degrees for 45 minutes or until bubbling in the center.

*note: recipe originated in a church cook-book and everyone insists that my husband’s mom makes it for Thanksgiving each year.


The Frugal Gourmet by Jeff Smith
Page 116
Black-eyed Pea Salad

½ pound black-eyed peas, soaked over-night, drained
4 green onions, chopped
¼ cup olive oil
1/8 cup white wine vinegar
2 tbsp lemon juice
Tabasco to taste
Salt and pepper to taste

Cook black-eyed peas in fresh water until tender but firm, about 45 minutes (if you substitute frozen, cook as directed on package - DO NOT USE CANNED). Drain. Combine all ingredients, chill, and marinate in refrigerator several hours before serving. Serves 4-6.


Internet Recipe (Lost the Link – Sorry)
Sweet Potato Casserole Bliss

2 eggs
½ tsp nutmeg
½ tsp cinnamon
3 cups canned sweet potatoes (not yams)
3 cups fresh sweet potatoes, cooked and mashed
1 cup evaporated milk (pet milk)
1 cup brown sugar
¾ cup butter
1 tsp. salt
1 cup corn flakes, crushed
1 cup pecans, crushed
½ cup brown sugar
¾ cup melted butter

Cook and mash fresh sweet potatoes to make 3 cups. Mix together with canned sweet potatoes, eggs, nutmeg and cinnamon. Add milk, brown sugar, and salt.

Pour into 13X9 inch casserole and bake 30 minutes at 425 degrees. Make topping of crushed corn flakes, pecans, brown sugar, and melted butter.

When done baking, put topping on and brown for another 15 minutes in 400 degree oven.


Best of the Best from Louisiana
Page 143
Seasoning the Turkey

Amounts depend on size of turkey:
Mixture of salt, black pepper and red pepper flakes
Garlic, chopped
Bell pepper, chopped
Pecan halves
Butter, cut into pats
Celery
Parsley

1. Rinse thawed bird and pat dry.
2. Puncture all meaty parts with the point of a knife to form deep but narrow pockets all over the bird. (Be sure to make many pockets all over breasts and thighs.)
3. Mix salt, black pepper and red pepper together.
4. Add chopped garlic and bell pepper to salt mixture.
5. Take small amount of this seasoning and push it down into pockets.
6. Now push 1 or 2 pecan halves into each of the slits.
7. Finish by putting a small pat of butter into each pocket.
8. Rub entire outside with salt, red and black peppers.
9. Season cavity with salt and pepper.
10. Add about 1/3 bunch of parsley, 1/3 bunch of green onions, and 2 or 3 pieces of celery.
11. Cook turkey as desired until tender.
12. The roasting process is not complicated, but timing is important. It takes several hours, whether turkey is cooked in a covered roasting pan or barbecued on a rotisserie.
13. Use the suggested roasting time on the wrapping, but 30 minutes before the end of suggested time, test for doneness. This can be done by inserting a meat thermometer deep into the thigh (not touching the bone). When thermometer reaches 180 to 185 degrees, the turkey is done.
14. Another way to tell is to protect the thumb and forefinger with a cloth or paper towel and pinch the thickest part of the drumstick. When done, the meat will be soft to the touch and the drumstick will move easily in the socket.

(The cookbook above also has a wonderful Louisiana style cornbread dressing with onion, parsley, green pepper, butter, cooked rice, chopped and boiled eggs, (optional oysters and chicken livers for those of you brave souls who like that kind of thing), chicken broth, some seasonings and a dash of Tabasco)


Family Recipe (Husband’s Step-Mom)
Nana’s Turkey Dressing

Large Mixing Bowl
3-4 boxes/packages of cornbread
White or wheat bread, dried and crumbled or stuffing bread cubes
Poultry Seasoning
Rubbed Sage
Salt and pepper
Pet or canned milk and a little plain milk
Chicken or turkey broth (1 or 2 cans if you use chicken)
Celery and onion to taste (browned in skillet with butter)
Boiled eggs, chopped – to taste
Shredded meat from the bird if desired

All ingredients above are to taste. Nana (my husband's step-mom) doesn’t use any measuring gear other than her eyes and hands. I thought my grandma’s stuffing couldn’t be beat, but I have come to savor Nana’s recipe as much (Shhhh! If not more. Don’t tell my grandma!) Here’s her instructions:

Cook cornbread. Brown onion and celery in a skillet with butter until golden and a bit soft. Boil eggs, peel and chop. Mix crumbled cornbread and bread crumbs (toasted or stale), poultry seasoning, sage, salt and pepper together in large mixing bowl. Pour in one can of chicken broth and one can of condensed milk/pet milk and stir… keep adding a little of each until you get the mixture to desired consistency. It shouldn’t be very thin, but also not very thick. Add onion and celery with eggs to cornbread mixture. Pour mixture into cake pan (and some into turkey or chicken cavity if desired). Bake in 400 degree oven for 30 minutes uncovered. Turn heat down to 375 degrees and test to see if stuffing is done to your liking. Some like it more moist, and others like it more dry. Fluff with a fork before serving.

Note: You can blend a bit of the ingredients from the Louisiana recipe above and add a little Thyme if you wish.


Family Recipe (Brother-in-Law)
Richard’s Sautéed Green Beans (a variation of the traditional green bean casserole)

Fresh green beans
Bacon grease or meat drippings from pan
Garlic to taste
Cooking oil to taste
Seasonings to taste (salt, pepper, red pepper flakes, Tabasco, whatever you like)
Worcester, Soy, or Teriyaki sauce (optional)
Sautéed fresh onion, thinly sliced or French’s Onion topping
Toasted Almonds (optional)
Cream of Chicken, Celery or Mushroom Soup (optional)

All ingredients above are to taste. If you use fresh green beans (preferred), you can steam them some before you begin cooking them with the other ingredients. If you use the nuts and fresh onions, toast/sauté them on the pan before you add the rest of the ingredients. Add all ingredients together on a pan with oil and meat drippings/bacon grease (to taste), and pan-fry until beans are desired consistency. Taste as you go, and add whatever you like.

___________________________________


Well, there you have it... all in one post. A couple of those recipes are elsewhere on the blog, but I thought it would be nice to put them in one place so you can print it easily if you want. Be sure to stop in and tell me if you made them this year for Thanksgiving or Christmas and let me know what you thought. ENJOY!

Technorati Tags: , , , , , , , , , , , , , , , , , , , , ,